


If safe water-bath canning depends on staying below pH 4.6, why do so many old pantry methods still rely on guesswork? That question is exactly why chili sauce recipe canning deserves a modern, careful approach. When the balance of tomatoes, peppers, onions, sugar, and 5% acidity vinegar is right, you get a bright, tangy, gently sweet sauce that tastes like late summer in a jar and stores beautifully.
Introduction to Chili Sauce Recipe Canning
A good chili sauce sits somewhere between ketchup, tomato relish, and a pourable barbecue-style condiment. It is smooth or slightly textured, sweet-tart, peppery, and deeply savory. It belongs next to fries, roasted potatoes, grain bowls, burgers, meatloaf, and scrambled eggs. It also turns basic pantry meals into something worth remembering.
For home cooks, chili sauce recipe canning offers two wins at once: flavor and shelf life. You get the freshness of tomato season preserved in a practical form, and you also gain a make-ahead condiment that earns its spot in the pantry. The key is precision. Safe canning is less about instinct and more about ratios, heat, headspace, and processing time.
This version keeps the ingredient balance classic and uses a boiling-water canner, with the note that altitude adjustments still matter. If you live above 1,000 feet, check current USDA or extension guidance for your exact processing time.
Ingredients for Chili Sauce Recipe Canning
The ingredient list is simple, though each item has a job to do. Tomatoes bring body and sweetness. Vinegar keeps the flavor lively and supports safe acidity. Peppers add heat and aroma. Sugar rounds off the sharp edges.
Use firm, ripe tomatoes and bottled vinegar labeled 5% acidity. That detail matters.
| Ingredient | Amount | Why it matters | Substitution notes |
|---|---|---|---|
| Ripe tomatoes, peeled and chopped | 5 pounds | Base flavor, natural sweetness, body | Use paste tomatoes for a thicker sauce and shorter simmer time |
| Onion, finely chopped | 2 cups | Sweetness and savory depth | Yellow or white onions both work |
| Sweet red bell pepper, finely chopped | 2 cups | Color, mellow pepper flavor | Orange or yellow bell peppers are fine |
| Hot peppers, finely chopped | 2 to 4 small | Heat and brightness | Jalapeños or Fresno peppers work well |
| White vinegar, 5% acidity | 2 cups | Tang and safe acidity for canning | Apple cider vinegar can be used if labeled 5% acidity |
| Granulated sugar | 1 cup | Balances acidity | Reduce modestly for a tangier sauce, but do not reduce the vinegar |
| Pickling or canning salt | 1 tablespoon | Flavor and clean finish | Avoid iodized salt for the clearest sauce |
| Celery seed | 1 teaspoon | Classic chili sauce note | Can be omitted |
| Ground cinnamon | 1/2 teaspoon | Warm background spice | Use a tiny pinch of allspice instead |
| Ground cloves | 1/4 teaspoon | Depth and old-fashioned warmth | Use sparingly; too much can dominate |
This yields about 6 to 7 half-pints or roughly 3 to 4 pints, depending on how far you reduce the sauce.
Timing for Chili Sauce Recipe Canning
This is not a 20-minute dinner recipe, though it is very manageable. Most of the clock time is passive simmering and canner processing, not hands-on work.
| Task | Time |
|---|---|
| Prep vegetables and tomatoes | 30 to 40 minutes |
| Simmer and reduce sauce | 45 to 75 minutes |
| Fill jars and process | 25 to 30 minutes |
| Total time | 1 hour 40 minutes to 2 hours 25 minutes |
A wider pot usually shortens the simmer because more surface area means faster evaporation. That one change can save 15 minutes or more without changing the recipe itself.
Step-by-Step Chili Sauce Recipe Canning Instructions
A calm rhythm makes this recipe feel much easier than it looks.
Step 1: Prepare the jars, lids, and canner
Wash jars in hot soapy water and keep them hot until filling time. Set up a boiling-water canner with enough water to cover the jars by at least 1 inch. Bring the water toward a simmer while you make the sauce.
Read through the full process before you start. Canning goes smoothly when the sauce, jars, funnel, bubble remover, and towels are all within reach.
Step 2: Peel and chop the tomatoes and vegetables
To peel tomatoes, score a small X on the bottom of each one, dip them in boiling water for 30 to 60 seconds, then transfer to cold water. The skins should slip off easily. Core, peel, and chop the tomatoes.
Finely chop the onions, bell peppers, and hot peppers. Smaller pieces cook down faster and create a more even sauce. If you want moderate heat, remove the seeds and membranes from the hot peppers.
Step 3: Cook the chili sauce base
Add the tomatoes, onions, sweet peppers, hot peppers, vinegar, sugar, salt, celery seed, cinnamon, and cloves to a large nonreactive pot. Bring the mixture to a boil, then reduce to a steady simmer.
Cook uncovered, stirring often, until the vegetables soften and the mixture thickens. This usually takes 45 to 75 minutes. The sauce should mound lightly on a spoon, though it will still be pourable.
Step 4: Adjust the texture
If you like a smoother chili sauce, use an immersion blender for a few brief pulses. You can also press the cooked mixture through a food mill. Leave a little texture if you enjoy a more old-fashioned finish.
Do not add cornstarch, flour, or extra vegetable puree to thicken it before canning. Thickness changes heat penetration, and that is one variable you do not want to improvise.
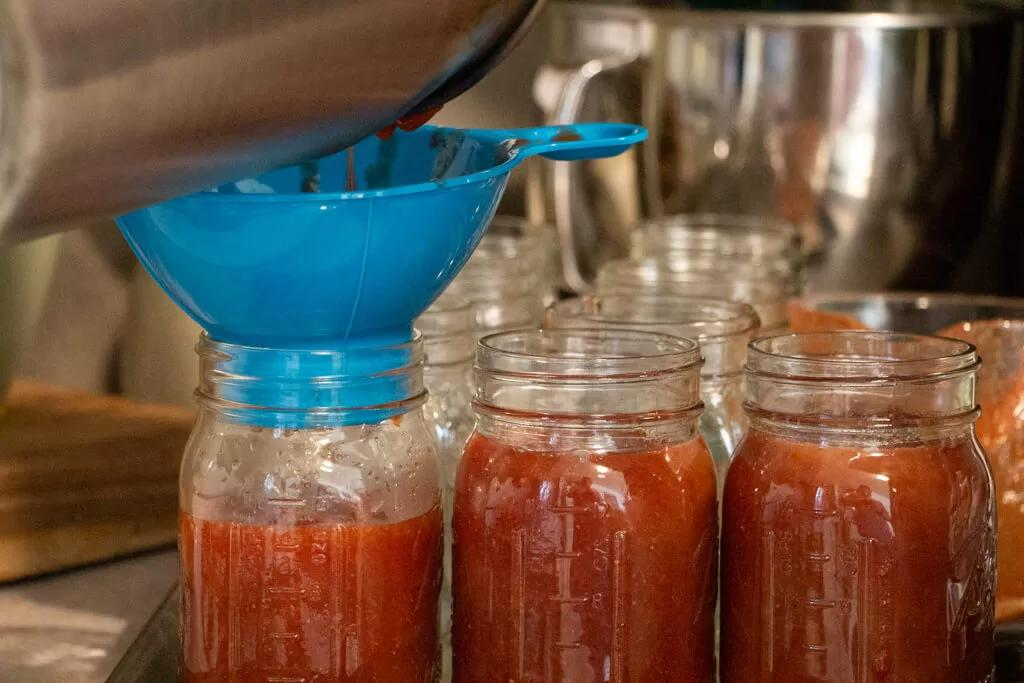
Step 5: Fill the jars
Ladle the hot chili sauce into hot jars, leaving 1/2 inch headspace. Run a bubble remover or a clean chopstick around the inside edge to release trapped air. Wipe the rims with a damp clean cloth, apply lids, and screw bands on to fingertip tight.
This is a good moment to pause and check consistency. If the sauce looks thin, return the pot to the stove and simmer a little longer before filling the next jars.
Step 6: Process the jars in a boiling-water canner
Place the filled jars on the rack in the canner. Make sure the water covers the tops by at least 1 inch. Bring to a full rolling boil, cover, and process 15 minutes for pints or half-pints at 0 to 1,000 feet, then adjust for altitude as needed.
Keep the boil steady for the entire processing time. A weak simmer is not the same thing.
Step 7: Cool, seal, and label
Turn off the heat, remove the canner lid, and let the jars rest in the water for 5 minutes. Lift them out and place them on a towel-lined surface. Leave them undisturbed for 12 to 24 hours.
Check seals, remove the bands, wipe the jars, and label them with the date. Any jar that did not seal should go into the refrigerator and be used soon.
Nutritional Information for Canned Chili Sauce
Nutrition varies with your final yield and how far you reduce the sauce. The numbers below are a practical estimate for 2 tablespoons of finished chili sauce.
| Nutrient | Approximate amount |
|---|---|
| Calories | 18 |
| Carbohydrates | 4.5 g |
| Sugars | 3.5 g |
| Fiber | 0.4 g |
| Protein | 0.3 g |
| Fat | 0 g |
| Sodium | 70 to 90 mg |
This makes chili sauce a flavor-forward condiment with a modest calorie load. Most of its energy comes from natural tomato sugars plus the added sugar used to balance acidity.
Healthier Chili Sauce Recipe Canning Alternatives
You can lighten the flavor profile without stripping away the character that makes chili sauce so useful. The safest approach is to keep the vinegar amount fixed and make only measured, flavor-based changes.
A few smart tweaks can move the sauce toward lower sugar, lower sodium, or more vegetable depth while keeping it pantry-friendly.
- Lower sugar option: Reduce sugar from 1 cup to 3/4 cup for a sharper, brighter sauce
- Lower sodium option: Cut salt to 2 teaspoons, then season more when serving
- Deeper vegetable flavor: Use all red bell peppers for a sweeter, richer finish
- Smoky note: Add a small amount of smoked paprika after opening the jar, not before canning
If you need a sauce with no added sugar, the texture and flavor can still work well, though the vinegar will taste more assertive. Many home cooks like that style with roasted potatoes, veggie burgers, or lentil loaf.
Serving Suggestions for Home-Canned Chili Sauce
This is one of those condiments that quietly solves dinner. A spoonful can wake up leftovers, bring balance to rich foods, or turn a simple grain bowl into a full meal.
It also works as a cooking ingredient. Stir it into baked beans, brush it over roasted cauliflower, or whisk it with olive oil for a quick glaze.
- Fries and oven wedges
- Veggie burgers
- Breakfast potatoes
- Lentil loaf
- Grilled mushrooms
- Rice bowls with beans
- Scrambled eggs or tofu
- Meatballs or roasted chicken
- If you like layered flavor, mix a few tablespoons of chili sauce with plain yogurt, mayo, or tahini after opening the jar. That gives you a fast dip or sandwich spread with almost no effort.
Common Chili Sauce Recipe Canning Mistakes to Avoid
Most canning problems come from small shortcuts. The good news is that they are easy to avoid once you know where they show up.
A little discipline here protects both flavor and safety.
- Changing the acid balance: Do not reduce the vinegar or add extra low-acid vegetables without a tested formula
- Using weak vinegar: Choose bottled vinegar labeled 5% acidity
- Over-thickening the sauce: A very dense sauce may not heat evenly during processing
- Skipping headspace checks: Too little headspace can cause siphoning; too much can affect sealing
- Ignoring altitude: Processing time changes with elevation
- Tightening bands too hard: Overtight bands can prevent proper venting during processing
Another common issue is rushing the cooling period. Let jars sit undisturbed until fully cool. Tilting, pressing lids, or retightening bands too early can interfere with the seal.
Storing Tips for Chili Sauce After Canning
Once sealed, store jars in a cool, dark, dry place. Quality is usually best within 12 months, though properly sealed jars often remain usable longer. Good storage protects color, flavor, and texture.
After opening, refrigerate the jar and use it within 3 to 4 weeks for the freshest taste. Always use a clean spoon, keep the rim tidy, and watch for any changes in smell, bubbling, or mold.
For make-ahead prep, you can chop the onions and peppers a day early and refrigerate them. You can also peel tomatoes ahead of time and chill them overnight. That breaks the job into smaller pieces and makes canning day feel lighter.
Ready to Make This Chili Sauce Recipe Canning Project
Bright tomatoes, measured vinegar, steady simmering, and correct processing create a pantry sauce that is both practical and deeply flavorful. Try this chili sauce recipe canning method, then share your results in the comments or review section and subscribe for more preserving ideas, weeknight recipes, and kitchen tips.
Chili Sauce Recipe Canning FAQs
Can I use cherry tomatoes or heirloom tomatoes?
Yes, though the texture and sweetness may vary. Paste tomatoes usually give the thickest result. Whatever tomato you choose, keep the vinegar amount unchanged.
Do I need to peel the tomatoes?
For the smoothest texture, yes. Peels can create a rough finish and may separate in the jar. If you run the sauce through a food mill after cooking, that can also solve the texture issue.
Can I make this chili sauce hotter?
You can raise the heat modestly by using the higher end of the hot pepper range or choosing spicier peppers. Keep the total amount of low-acid vegetables in the same general range and do not reduce the vinegar.
Is this the same as hot sauce?
No. Chili sauce is thicker, sweeter, and more tomato-forward. Hot sauce is usually thinner, sharper, and built around peppers first.
Why did my jars lose some liquid during processing?
That is called siphoning. It often happens when jars are overfilled, the canner boil is too aggressive, or the jars are moved too quickly after processing. If the jars sealed and still contain enough liquid to cover the food, they are usually fine.
Can I freeze the sauce instead of canning it?
Yes. If you would rather skip the canner, cool the finished sauce, pack it into freezer-safe containers, and freeze it. Leave room for expansion and thaw in the refrigerator before using.