


Some desserts whisper. Fudgy brownies speak up. They’re unapologetically chocolatey, dense in the best way, with a paper-thin, crinkly top that shatters when you cut in. The center stays soft and moist, almost truffle-like. One square can turn a regular afternoon into something worth savoring.
This isn’t accidental. The texture you crave comes from a few deliberate choices: more fat than flour, real chocolate plus cocoa, enough sugar to encourage that shiny top, and a bake that stops just short of fully set. Once you see how the pieces fit, you can tweak to your taste and hit that fudgy target every single time.
What Makes a Brownie Fudgy Instead of Cakey
Brownies sit on a spectrum. On one end you have cakey, light, and open-crumbed. On the other, dense, rich, and almost chewy. The levers that move you along that line are simple.
- Fat: A high ratio of butter and chocolate creates lushness and a close crumb.
- Flour: Less flour keeps the structure soft. More flour introduces lift and dryness.
- Cocoa vs chocolate: Melted chocolate adds cocoa solids plus cocoa butter, which boosts richness and keeps the texture supple. Cocoa powder alone can be great, but it leans drier unless you increase fat or sugar.
- Eggs and sugar: Eggs add structure and moisture. Beating them with sugar gives you the glossy, crinkly top and a slightly thicker batter.
Cakey brownies often include baking powder, extra flour, or both. Fudgy brownies skip the leavener, limit flour, and rely on chocolate, butter, and technique.
The Flavor Blueprint
Think balance. You want deep chocolate notes, a hint of bitterness, and a rounded sweetness. A pinch of salt snaps the flavors into focus. Vanilla softens the edges. Espresso powder, used sparingly, doesn’t make the brownies taste like coffee; it just intensifies chocolate, similar to how a pinch of salt wakes up tomato sauce.
Quality matters. You don’t need extravagant chocolate, but choose a bar you enjoy eating out of hand. Semi-sweet or dark in the 55 to 70 percent range works beautifully.
The Fudgy Brownie Recipe
Yield: 16 small squares in an 8-inch pan
- 3/4 cup (170 g) unsalted butter, cut into pieces
- 6 oz (170 g) dark chocolate, chopped
- 1 cup (200 g) granulated sugar
- 1/2 cup (100 g) light brown sugar, lightly packed
- 2 large eggs, room temperature
- 1 large egg yolk, room temperature
- 2 teaspoons pure vanilla extract
- 1 teaspoon fine espresso powder, optional
- 3/4 cup (95 g) all-purpose flour
- 1/3 cup (35 g) Dutch-process cocoa powder
- 1/2 teaspoon fine sea salt
- 1 tablespoon neutral oil, optional, for extra gloss
- 3 oz (85 g) chocolate chunks or chips, optional

Step-by-Step Directions
- Prep the pan Line an 8 by 8 inch metal pan with parchment, leaving overhang on two sides for easy lifting. Lightly grease the parchment. Heat the oven to 325°F with a rack in the lower-middle position.
- Melt butter and chocolate Combine butter and chopped chocolate in a heatproof bowl. Set the bowl over a pot of barely simmering water, making sure the bottom doesn’t touch the water. Stir until smooth. You can also use short bursts in the microwave, stirring every 20 to 30 seconds. Cool for 3 to 5 minutes until warm, not hot.
- Build the shiny top Add granulated sugar and brown sugar to the warm chocolate mixture and whisk for 60 to 90 seconds. The warmth helps dissolve some sugar crystals, which boosts that glossy, crackly top later. Add the oil if using.
- Whisk in eggs Add the eggs and yolk. Whisk vigorously for 1 to 2 minutes until the batter thickens slightly and looks satiny. Whisk in vanilla and espresso powder.
- Fold in dries Sift flour, cocoa, and salt over the bowl. Switch to a spatula and fold gently until no dry pockets remain. Stop early rather than late. Add chocolate chunks if using and give two or three more folds to distribute.
- Bake Spread the batter into the pan, smoothing the top. Bake 28 to 35 minutes, rotating the pan once. You’re looking for a glossy top with micro cracks, edges that look set, and a center that still looks slightly soft. A toothpick should come out with moist crumbs, not wet batter.
- Cool for clean slices Set the pan on a rack and cool for at least 30 to 45 minutes. Lift out using the parchment and cut with a warm knife. For tidy edges, chill for 30 minutes before slicing, then bring to room temperature to serve.
Tip: An instant-read thermometer takes out the guesswork. Pull brownies between 185 and 195°F in the center for fudgy texture.
The Science of Fudge
Two things create that luscious, almost creamy texture: higher fat and lower flour. Butter and chocolate melt into the batter, filling spaces that flour would otherwise occupy. Sugar binds water and keeps the texture moist. Beating the eggs with warm sugar gives you a thin meringue-like layer on top as it bakes, which cracks into that signature crust.
Cocoa powder helps bridge flavor and structure. Dutch-process has a smoother profile and deeper color, while natural cocoa tastes sharper. Either works, though Dutch-process tends to give a more velvety result in this style.
Pan Size, Bake Time, and Texture
Swapping pans changes brownie depth, which affects doneness cues and timing. Here’s a quick guide.
| Pan size and type | Approximate bake time at 325°F | Texture notes |
|---|---|---|
| 8 by 8 inch metal | 28 to 35 minutes | Deep, very fudgy center, classic crackly top |
| 9 by 9 inch metal | 24 to 30 minutes | Slightly thinner, still fudgy |
| 9 by 13 inch metal | 22 to 28 minutes | Thin and chewy at edges, soft center |
| 8 by 8 inch glass | 32 to 40 minutes | Needs longer time, edges brown faster |
| 8 by 8 inch ceramic | 35 to 45 minutes | Gentle heat, longer time, very soft center |
Metal pans set the edges neatly and keep the center reliable. Glass and ceramic hold heat differently, so watch closely near the end to avoid a dry edge.
Getting That Shiny Crinkly Top
Everyone wants it. Here’s how to stack the deck.
- Warm sugar meets melted chocolate: This helps dissolve crystals.
- Whisk eggs well: You want a satiny, slightly aerated batter.
- Don’t cut the sugar too much: Reducing by more than 20 to 25 percent usually kills the shine.
- Avoid overmixing the flour: Extra gluten development dulls the top.
If you miss the shine one day, the brownies still taste fantastic. The crust is a bonus, not the main event.
Flavor Variations That Keep Things Fudgy
The base is flexible. Keep the core ratios, then add layers of flavor.
- Nutty crunch: Stir in 3/4 cup toasted walnuts, pecans, or hazelnuts.
- Triple chocolate: Mix a blend of milk, semi-sweet, and extra-dark chunks.
- Salty finish: Sprinkle flaky sea salt over the batter before baking.
- Peanut butter ribbon: Warm 1/3 cup peanut butter until pourable, dollop and swirl lightly.
- Mint hint: Add 1/2 teaspoon peppermint extract with the vanilla.
- Chili-kick: Blend 1/2 teaspoon ground ancho or chipotle plus a pinch of cinnamon into the dries.
- Tahini swirl: Use 1/3 cup tahini with 1 tablespoon honey, dollop, and swirl.
- Caramel streaks: Spoon 1/3 cup thick caramel onto the batter and swirl gently.
Keep swirls light. Overmixing swirls into the batter can throw off baking and shiny top development.
Gluten-Free and Dairy-Free Tweaks
- Gluten-free: Use a cup-for-cup gluten-free baking flour that contains starches and xanthan gum. Weigh to 95 g. Let the batter rest 10 minutes before baking to hydrate.
- Almond flour blend: Replace 1/3 of the flour with superfine almond flour for extra tenderness.
- Dairy-free: Swap butter for 2/3 cup neutral oil or use a plant-based butter with at least 80 percent fat. Choose dairy-free chocolate.
- Egg-free: Whip 6 tablespoons aquafaba until foamy and use in place of the 2 eggs. Keep the yolk or swap it for 1 tablespoon aquafaba plus 1 teaspoon oil. Texture gets a bit softer but still pleasing.
Common Pitfalls and Quick Fixes
- Dry or cakey: Too much flour or overbaking. Weigh ingredients and pull early next time. A warm drizzle of chocolate ganache can rescue a dry batch.
- Greasy top: Butter too hot or chocolate seized. Let the mixture cool before adding sugar and eggs.
- No shiny crust: Sugar reduced too far, eggs under-whisked, or batter overmixed after adding flour. Next time whisk longer after the eggs and don’t skimp on sugar.
- Sunken center: Slight sink is normal for fudgy brownies. A deep crater points to underbaking. Add 3 to 5 minutes next time or check your oven temperature with an oven thermometer.
- Tough edges: Pan stayed in a hot oven too long or used glass without adjusting time. Try a metal pan and remove once edges pull away slightly.

Ingredient Notes That Pay Off
- Chocolate percentage: 60 to 66 percent hits a sweet spot for fudgy texture and balanced taste. Higher cacao gives a drier set unless you bump fat.
- Cocoa choice: Dutch-process gives a smoother, darker brownie. Natural adds brightness. You can blend them 50:50.
- Salt: Fine sea salt disperses evenly. A pinch more on top tightens flavors.
- Sugar split: A mix of granulated for structure and light brown for moisture and depth works well.
- Oil addition: A tablespoon of neutral oil gives a polished surface and a slightly chewier bite.
Serving Ideas
Warm brownies with cold ice cream is an easy win. Vanilla is classic, but pistachio, coffee, or cherry ripple add a fun twist.
More ways to enjoy them:
- Sandwich two squares around a scoop of ice cream and roll the sides in chopped nuts.
- Crumble over Greek yogurt with berries for a not-too-sweet dessert.
- Cube and fold into whipped cream for a quick trifle.
- Pair with a small pour of tawny port or a rich stout.
Storage and Freezing
- Room temperature: Store cut brownies in an airtight container for up to 4 days. Add a slice of bread for humidity if your climate is dry.
- Fridge: Chill for up to a week for a firmer, fudgier bite. Bring to room temp or warm slightly to serve.
- Freezer: Wrap the whole slab or individual squares tightly, then place in a freezer bag. Freeze up to 3 months. Thaw in the fridge or at room temperature. Rewarm at 300°F for 5 to 8 minutes for that just-baked aroma.
Make-Ahead Tips
- Batter rest: The mixed batter can rest in the pan at room temperature for 20 minutes if you need to pace your baking. The top stays shiny, and the interior bakes evenly.
- Pre-baked for events: Bake one day ahead, cool, and refrigerate. Slice cold for clean edges, then serve at room temp.
Equipment That Actually Helps
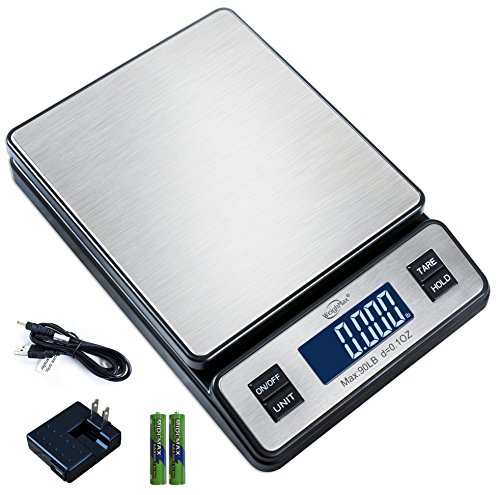
- Digital scale: Accurate flour and sugar lead to repeatable results.
- Instant-read thermometer: Pull at the sweet spot for fudgy centers.
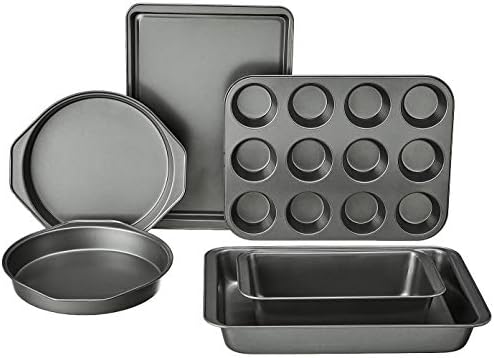
- Metal baking pan: Better edge set and consistent heat.
- Parchment paper: Lift out the slab without drama.
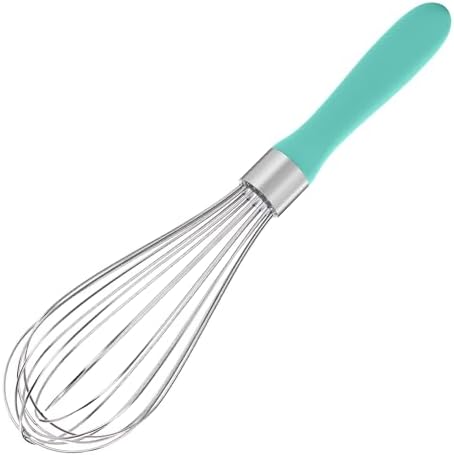
- Balloon whisk and sturdy spatula: Whisk for shine, fold for tenderness.
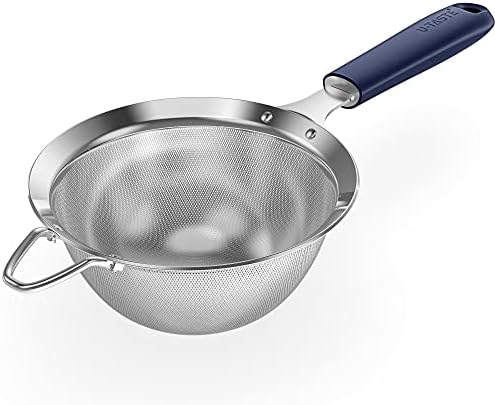
- Fine-mesh sieve: Sift cocoa and flour to prevent lumps.


Swaps and Substitutions
- All chocolate, no cocoa: Increase chocolate to 9 oz and omit cocoa. Reduce butter to 1/2 cup to balance fat. Expect a silkier, slightly softer set.
- All cocoa, no chocolate: Use 3/4 cup cocoa total, keep butter at 3/4 cup, and add 1 extra tablespoon oil. Flavor runs darker and more intense.
- Oil instead of butter: Use 2/3 cup neutral oil. The texture leans extra chewy and stays moist longer.
- Sugar reduction: Up to a 20 percent cut keeps texture decent. More than that risks a dull top and a drier bite.
Frequently Asked Questions
Q: Can I double the recipe? A: Yes. Use a 9 by 13 inch metal pan. Bake at 325°F for 28 to 35 minutes. Start checking early and pull when the center reaches about 190°F.
Q: Why are my brownies gooey in the middle but hard at the edges? A: Your oven may run hot, or the pan material is slowing center heat. Try an oven thermometer, bake on a lower rack, and consider a metal pan. Pull them a touch earlier and let carryover heat finish the job.
Q: How do I get ultra-thick brownies? A: Use the 8 by 8 inch pan, don’t overmix after adding the flour, and watch the bake window closely. Pull when the center is barely set. Chilling before slicing helps the structure.
Q: Can I add fruit or jam? A: Swirl in 1/3 cup thick raspberry jam or cherry preserves. Keep it thick to avoid soggy pockets.
Q: Do I need baking powder? A: No. For fudgy brownies, skip it. Lift comes from steam and egg structure, not chemical leaveners.
Q: Why does my top crack too much? A: Some cracking is desirable. If the surface shatters deeply, the batter might be too dry or overbaked. Slightly increase fat or pull earlier.
A Short Tasting Guide
When you cut in, the knife should meet a delicate shell and glide through a dense center. The aroma should hint at coffee even if you didn’t add espresso powder. Flavors should land in layers: a rush of chocolate, a soft sweetness, a pop of salt.
If you want more chew, bake one or two minutes longer. If you want more fudge, pull a minute earlier and chill the slab before slicing. Small adjustments give you your favorite style.
Scaling for a Crowd
- Two 8 by 8 pans bake more evenly than a single 9 by 13 when your oven runs hot.
- For bake sales, cut 2 by 2 inch squares and wrap individually once cool.
- If you need clean edges in quantity, chill the whole slab overnight and use a hot, wiped knife for each cut.
A Quick Cocoa-Only Version
No chocolate bar on hand? This one still comes out rich.
- 3/4 cup (170 g) unsalted butter
- 1 1/2 cups (300 g) granulated sugar
- 3 large eggs
- 2 teaspoons vanilla
- 3/4 cup (65 g) Dutch-process cocoa
- 3/4 cup (95 g) all-purpose flour
- 1/2 teaspoon salt
- 2 tablespoons neutral oil
- 2 tablespoons hot water or hot coffee
Melt butter. Whisk in sugar and hot water or coffee. Beat in eggs and vanilla for 1 to 2 minutes. Sift cocoa, flour, and salt over the bowl. Fold in along with the oil. Bake at 325°F in an 8 by 8 pan for 28 to 35 minutes. The hot liquid blooms the cocoa for a deeper chocolate profile.
When to Cut and How to Serve
- If serving warm, give them at least 20 minutes to set so the squares hold shape.
- For tidy edges, chill briefly and cut with a hot knife, wiping between cuts.
- Bring back to room temp for the best flavor, or warm briefly in a low oven.
A little planning turns a simple batch into something special. The ratios are friendly, the method is forgiving, and the results feel luxurious. Keep good chocolate in the pantry, know your oven, and let the glossy top guide you. The rest is just slicing and sharing.