


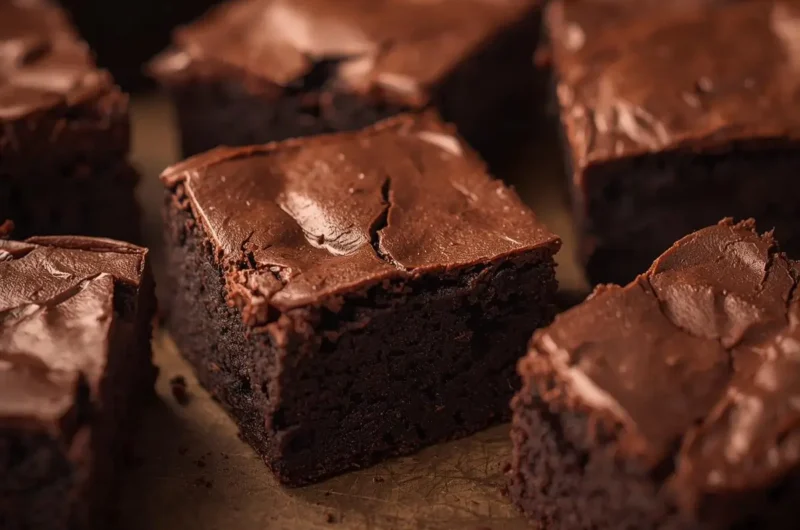
There are brownies that taste great, and then there are brownies that make time slow down for a moment. The kind with a glossy top, a dense middle, a clean chocolate snap at the edge, and a fragrance that hints at toasted cocoa and butter. The secret rarely lives in a mountain of pricey chocolate bars. It starts with good cocoa and a smart technique.
Cocoa fudge brownies lean into pure flavor. They bake up with a deep chocolate profile, not overly sweet, with a chew that satisfies. When you get the batter balance right, you’ll land squarely in fudgy territory, and the reward is guaranteed.
Why cocoa brownies stand out
Solid chocolate brings cocoa butter and extra sugar into play, which is lovely for certain styles. Cocoa powder delivers chocolate flavor without the added cocoa butter and with zero water content. That means:
- More control over fat and moisture
- Intense flavor without dilution
- A glossy top that shows up reliably with the right sugar and egg method
A bonus: cocoa brownies are pantry-friendly and consistent across seasons. No hunting for fancy bars, no guessing the sweetness of your chocolate. Your cocoa, your sugar, your butter, your rules.
Ingredient spotlight
Ingredients impact texture more than most bakers expect. A small tweak can flip a brownie from dense to cakey.
- Cocoa powder: Natural cocoa brings brightness and a slightly fruity edge. Dutch-process has a smoother, darker flavor. Both work. Choose based on your taste.
- Butter and oil: Butter for flavor, a touch of oil for tenderness and fudginess. Using both gives the best of each.
- Sugar mix: Granulated sugar helps create a crackly top. Brown sugar adds moisture and a hint of caramel.
- Eggs: They provide structure and help whip that shiny crust into existence.
- Flour: Use just enough to set the center. Too much pushes you into cake territory.
- Salt and vanilla: Small, vital, never skip.

Choosing cocoa: natural, Dutch, or black
You can make incredible brownies with any good cocoa. Here is how they differ.
- Natural cocoa: Lighter color, sharper edge, livelier aroma.
- Dutch-process cocoa: Treated to reduce acidity, tastes rounder and darker, with a more mellow finish.
- Black cocoa: Intense color and Oreo-like notes, but too much can mute overall flavor.
Consider blending two types for balance. A mix of 70 percent Dutch and 30 percent natural gives depth and brightness.
Tools and prep
You do not need a mixer, only a whisk, a spatula, and heatproof bowls. Line the pan with parchment for easy lifting and clean edges. Lightly grease the parchment.
- Best pan for fudginess: 8-inch square metal pan
- Second best: 9-inch square metal pan
- Avoid heavy glass for precise timing, since it holds heat and can overbake the edges
Preheat the oven and clear space to cool the pan quickly on a wire rack. That cool-down window protects the center from overbaking.

- Modern Style: This large long kitchen table featuring a rectangular shaped design surrounded by wooden waveform, has a s…
- Large Dining Room Table: This 78.74 inch dining table comfortably seats 6-10 people, perfect for family gatherings or en…
- Sturdy & Durable: Crafted from high quality MDF and wood veneer, the tabletop and wood base provide lasting durability a…
- [Modern Focal Point for Small Spaces]: Elevate your dining experience with the Recaceik 5-piece set, the perfect small d…
- [Durable & Scratch-Safe Construction]: Engineered for resilience, this dining room table set features a reinforced metal…
- [Cloud-Like Ergonomic Comfort]: Sink into luxury with our set of 4 ergonomic dining chairs. Each chair is upholstered in…
The recipe
Cocoa Fudge Brownies: A Decadent Recipe to Try Today
Course: Brownies recipesCuisine: AmericanDifficulty: Easy16
servings10
minutes25
minutes190
kcal30
minutesIngredients
170 g unsalted butter, melted and warm (3/4 cup)
30 g neutral oil, optional but recommended (2 tablespoons)
250 g granulated sugar (1 1/4 cups)
100 g packed light brown sugar (1/2 cup)
2 large eggs + 1 yolk, room temperature
2 teaspoons pure vanilla extract
60 g natural cocoa powder (about 3/4 cup) or 55 g Dutch-process (about 2/3 cup)
95 g all-purpose flour (3/4 cup, spooned and leveled)
1 teaspoon instant espresso powder, optional
1/2 teaspoon fine sea salt
120 g chopped dark chocolate or chips, optional but great for texture (about 3/4 cup)
Flaky salt for finishing
Step-by-step method
- Prep. Heat the oven to 325°F. Line an 8-inch square metal pan with parchment, leaving overhang on two sides.
- Bloom the cocoa. Place warm melted butter in a large bowl. Whisk in the cocoa powder and espresso powder until smooth and glossy. The cocoa hydrates and flavors the fat, which boosts intensity.
- Build the shiny top. Whisk in granulated sugar and brown sugar until thick and grainy. Add eggs and yolk one at a time, whisking for a full 30 seconds after each. Finish with vanilla. Whisk for another 1 to 2 minutes until the mixture lightens slightly. This step helps create that thin crackly crust.
- Fold the dry ingredients. Sprinkle flour and salt over the bowl. Fold gently with a spatula until just combined. A few streaks are fine. Fold in chopped chocolate if using.
- Bake. Spread batter evenly in the pan. Smooth the top. Bake for 28 to 35 minutes, rotating once near the end. The center should wobble slightly when nudged, and a toothpick inserted 2 inches from the edge should come out with a few moist crumbs.
- Quick cool. Set the pan on a rack. If you want a denser center, you can chill the pan after 10 minutes by resting it over a cool stovetop grate or on a second wire rack. Do not chill in the fridge while the pan is scorching hot, since that can warp it.
- Rest. Let brownies cool at least 1 hour in the pan, then lift out by the parchment and slice. For clean squares, chill 30 minutes before cutting with a warm knife.
Notes
- Ingredients for one 8-inch square pan:
- Baking temperature: 325°F (165°C)
Pan sizes and timing
Baking time depends on pan size, material, and your oven’s temperament. Use this table as a starting point and always keep an eye on visual cues.
| Pan size and material | Batter depth | Bake time at 325°F | Notes |
|---|---|---|---|
| 8-inch square, metal | Thick | 28 to 35 min | Fudgiest texture and reliable glossy top |
| 9-inch square, metal | Medium | 22 to 28 min | Slightly thinner, edges set faster |
| 8-inch square, glass | Thick | 32 to 40 min | Reduce oven temp by 15°F if edges brown too fast |
| 9 by 13-inch, metal (double batch) | Medium | 28 to 36 min | Great for a crowd, similar thickness to 8-inch |
| 9 by 5-inch loaf pan (half batch) | Thick | 24 to 30 min | Small batch option, check early |
Visual cues trump the clock. Look for a shiny, papery top, edges pulling away slightly, and the center barely set.
The science of fudgy texture
Fudgy brownies, like cocoa fudge brownies, rely on sugar, fat, and minimal flour. More sugar lowers the freezing point of water in the batter, which keeps the center supple even at room temperature. Butter and a bit of oil provide tenderness and a decadent mouthfeel.
Here are the levers you can adjust:
- Flour: Lower flour equals fudgier texture. Higher flour firms the crumb. The range here is purposely modest to avoid a cakey result.
- Eggs: Whole eggs build structure. Adding a yolk increases richness without toughening.
- Cocoa vs chocolate: Cocoa brings flavor without cocoa butter, so butter sets the fat profile. If you add chopped chocolate, you introduce cocoa butter back in, which softens the set and adds pockets of melt.
Whisking sugar and eggs helps form that glossy crust. During baking, the dissolved sugar rises and dries into a thin, delicate layer. If the top never turns shiny, the mixture likely needed more whisking, the sugar granules were too coarse to dissolve enough, or the batter was too cold.
Flavor upgrades
You can keep the base recipe exactly the same and shift the flavor in smart ways.
- Citrus: Rub 1 teaspoon orange zest into the sugar before mixing.
- Nutty: Toast 100 g pecans or walnuts, cool, and fold in. Or brown the butter until nutty before whisking in cocoa.
- Spice: Stir in 1/2 teaspoon cinnamon and a pinch of cayenne.
- Extracts: Almond extract pairs well with cherries or dried cranberries.
A little coffee deepens chocolate flavor without tasting like coffee. The espresso powder is optional, yet it works remarkably well.

Common pitfalls and quick fixes
Dry edges, soft center
- Lower the oven temperature to 315°F next time or move the rack one level lower. The goal is even heat.
- Use a metal pan rather than glass for better heat transfer.
No shiny top
- Whisk eggs and sugar longer. Aim for a slightly lighter, thick mixture before adding flour.
- Use fine granulated sugar. Coarse sugar may not dissolve enough.
Cakey texture
- Check your flour measurement. 95 g means a true 3/4 cup spooned and leveled, not a packed scoop.
- Reduce bake time by 2 to 3 minutes and pull while the center still jiggles faintly.
Greasy film on top
- Batter too cool or too much oil. Keep the melted butter warm when mixing and stick to the listed oil amount.
Collapsed center
- Overmixing after adding flour can trap air pockets that deflate. Fold gently and stop as soon as the flour disappears.
Make-ahead and storage
- Room temperature: Keep in an airtight container for 2 to 3 days. The flavor blooms on day two.
- Refrigerate: Up to 1 week, well wrapped. They slice like a dream when cold.
- Freeze: Wrap the entire slab or individual squares tightly, then place in a zip-top bag. Freeze up to 2 months. Thaw, then warm slightly for a soft center.
If serving to guests, bake a day ahead, chill, and slice just before serving for the cleanest presentation.
Cocoa buy guide
Two rules help more than any brand list. Freshness matters, and the aroma should smell alive.
- Check the date and look for a tight seal.
- If the cocoa smells flat or dusty, it will taste that way.
- Keep a jar of both natural and Dutch on hand. Blend to taste.
Some cocoas are darker because of alkalization, not because of superior quality. Trust your nose and the ingredient label.
Variations you will bake again
- Triple chocolate: Fold in 120 g dark chocolate and 60 g milk chocolate. Use Dutch cocoa for a rounder profile.
- Raspberry swirl: Dollop on 1/3 cup seedless raspberry jam, swirl lightly with a knife.
- Peanut butter ribbon: Warm 1/3 cup peanut butter until fluid, drizzle over the batter, and swirl.
- Mint chocolate: Add 1/2 teaspoon peppermint extract and 120 g chopped chocolate mints.
- Salted caramel: Drop teaspoons of thick caramel over the batter and drag a skewer through once or twice. Sprinkle with flaky salt after baking.
Keep the base ratio steady and let the mix-ins put their own spin on each batch.
Gluten-free and dairy-free notes
Gluten-free
- Swap the all-purpose flour for a high-quality 1:1 gluten-free baking blend. Look for one with rice flour and tapioca starch.
- Avoid overbaking, since gluten-free blends can dry out a touch faster.
Dairy-free
- Replace butter with 200 g refined coconut oil or a plant-based butter. Skip the extra oil if your plant butter contains a higher water percentage.
- Add 1 tablespoon of water if the batter looks too thick, as coconut oil firms quickly.
Both styles still deliver rich, fudgy cocoa fudge brownies with a glossy top if you keep the sugar and egg method the same.
Altitude adjustments
High elevation changes how brownies set, mostly due to faster evaporation and expanded gases.
- Increase eggs to 2 whole eggs plus 2 yolks for extra moisture and structure.
- Reduce sugar by 1 to 2 tablespoons to help the center set.
- Bake at 335°F and start checking earlier. Pull when the center barely jiggles.
Keep careful notes for your kitchen. Two houses on the same street can behave differently.
Serving ideas
Warm squares need nothing, yet a few accents feel special.
- A small scoop of vanilla or coffee ice cream
- Fresh berries and a light dusting of cocoa
- A drizzle of warm cream mixed with a spoon of Nutella
- Espresso on the side for a tidy, bitter counterpoint
- A pinch of flaky sea salt right after slicing
If you chill the brownies first, bring them to room temperature for 20 minutes to soften the center. The flavor opens up as the fat relaxes.
Cleaning up like a pro
Line the pan with parchment that covers the bottom and two sides. Grease lightly under the parchment so it sticks flat and does not crinkle the corners. Use a silicone spatula to scrape the bowl clean, and rinse it under hot water right away before the cocoa film sets.
A warm knife makes clean, precise cuts. Dip the blade in hot water, wipe, slice, wipe again. Repeat. It takes a minute and yields bakery-level edges.
Small-batch option
For a half pan in a 9 by 5-inch loaf pan:
- 85 g butter
- 1 tablespoon oil
- 125 g granulated sugar
- 50 g brown sugar
- 1 large egg + 1 yolk
- 1 teaspoon vanilla
- 30 g cocoa
- 48 g flour
- Pinch of salt
- 60 g chocolate
Bake at 325°F for 24 to 30 minutes. This version cools quickly and works nicely for weeknights.
Questions you might have
How do I know when they are done?
- Look for a shiny top, edges that pull away slightly, and a faint jiggle in the center. A toothpick should come out with damp crumbs, not wet batter.
Can I double the recipe?
- Yes. Use a 9 by 13-inch metal pan and start checking around 28 minutes.
Do I need espresso powder?
- No. It boosts chocolate flavor without adding coffee taste at this level. Leave it out if you prefer.
Why rest the brownies before slicing?
- The starches continue to set as they cool. Cutting too early can compress the crumb and steal moisture from the center.
Can I use all oil instead of butter?
- You can, but you will miss the butter flavor. Use 150 g neutral oil, and consider adding 1 tablespoon of milk or water to keep the texture plush.
What about mix-ins that melt?
- Soft caramels, marshmallows, and certain candies melt and can create gaps. Fold them in sparingly or add toward the top surface only.
The biggest lesson is simple. Trust your senses. Watch the top, feel the jiggle, smell the chocolate as it blooms. Once you dial it in for your oven and your cocoa, you’ll have a signature pan of brownies that never spends long on the counter.