


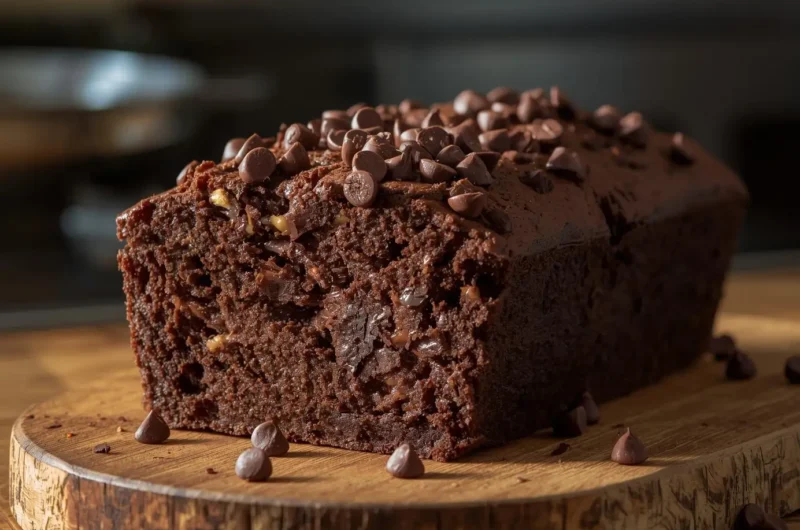
The scent of chocolate and banana drifting from the oven has a way of quieting a busy afternoon. Few bakes deliver comfort so reliably, and even fewer are this forgiving. Overripe bananas that look past their prime become a tender, glossy loaf with a crackly top and pockets of melted chocolate. It’s practical, nostalgic, and a little bit indulgent.
This version leans into deep cocoa flavor without losing banana’s mellow sweetness. The crumb stays moist for days, slices cleanly, and tastes even better on day two. If you’re after a loaf that feels both familiar and upgraded, you’re in the right kitchen.
What Makes This Loaf Work
Balance matters in a chocolate banana bread. Too much cocoa and the banana fades. Too much banana and the chocolate reads flat. Technique closes the gap: bloom the cocoa, use a blend of fats, and keep the batter just mixed.
- Ingredient strategy: Both oil and butter deliver moisture with a hint of richness; brown sugar adds depth while granulated keeps the crumb light.
- Texture: Greek yogurt or sour cream tenderizes and keeps the loaf plush without greasiness.
- Flavor boosters: Hot coffee wakes up cocoa’s aroma; vanilla rounds off any bitter edges.
- Make-ahead: The loaf slices beautifully on day two, and it freezes like a pro.
Ingredients at a Glance
Here’s a clear view of what you’ll need, with practical substitutions. Weights yield the most consistent results.
| Ingredient | US Measure | Metric | Notes |
|---|---|---|---|
| Very ripe bananas, mashed | 1.5 cups (about 3 large) | 340 g | Darkly speckled or black skins are best |
| All-purpose flour | 1 3/4 cups | 220 g | Spoon and level if not weighing |
| Unsweetened cocoa powder | 1/2 cup | 45 g | Natural or Dutch process both work |
| Light brown sugar | 3/4 cup | 150 g | Packed |
| Granulated sugar | 1/4 cup | 50 g | Balances sweetness and texture |
| Baking soda | 1 tsp | 5 g | Reacts with banana acidity |
| Fine salt | 1/2 tsp | 3 g | Key for flavor definition |
| Eggs | 2 large | 100 g | Room temperature if possible |
| Neutral oil | 1/3 cup | 70 g | Canola, sunflower, or grapeseed |
| Unsalted butter, melted | 2 tbsp | 28 g | Adds flavor without heaviness |
| Greek yogurt or sour cream | 1/3 cup | 80 g | Full-fat preferred |
| Vanilla extract | 2 tsp | 10 ml | Pure vanilla for best aroma |
| Hot brewed coffee | 2 tbsp | 30 ml | Or 1 tsp espresso powder plus 2 tbsp hot water |
| Chocolate chips or chopped chocolate | 1 cup | 170 g | Semi-sweet or dark |
| Chopped walnuts or pecans (optional) | 1/2 cup | 55 g | Toast first for more flavor |
Step-by-Step: From Bowl to Pan
A gentle hand is the secret here. Stir only until you no longer see dry flour. That restraint keeps the crumb tender.
Step 1: Prep the pan and oven. Heat the oven to 350°F. Grease a 9 by 5 inch loaf pan, then line it with a long strip of parchment that overhangs the long sides. The parchment sling makes removal easy.
Step 2: Bloom the cocoa. In a small bowl, stir the cocoa with the hot coffee until glossy and smooth. This quick step amplifies chocolate flavor.
Step 3: Whisk the dry ingredients. In a medium bowl, whisk the flour, baking soda, and salt. Set aside.
Step 4: Combine the wet ingredients. In a large bowl, whisk the mashed bananas, brown sugar, granulated sugar, eggs, oil, melted butter, yogurt, vanilla, and the cocoa mixture until well combined and smooth. No need for a mixer.
Step 5: Bring it together. Sprinkle the dry mixture over the wet mixture. Fold with a rubber spatula until you see only a few wisps of flour. Fold in the chocolate and nuts if using. Stop as soon as the batter looks uniform. Overmixing toughens the loaf.
Step 6: Bake. Scrape the batter into the prepared pan and smooth the top. For a classic split down the center, drag a buttered knife along the length of the batter to make a shallow groove. Bake 55 to 70 minutes, until a toothpick inserted in the center comes out with a few moist crumbs. If the top browns too quickly, tent loosely with foil for the final 10 minutes.
Step 7: Cool. Let the loaf cool in the pan for 15 minutes, then lift it out with the parchment and place it on a rack. Cool at least 1 hour before slicing. Warm bread can crumble, so patience pays off.
Pan Sizes, Bake Time, and Doneness Cues
A 9 by 5 inch pan gives a classic, slightly taller loaf with a proud crack. If you only have an 8.5 by 4.5 inch pan, start checking at 60 minutes and expect the full bake to reach 70 to 75 minutes. For muffins, portion the batter into a lined 12-cup tray and bake at 350°F for 18 to 22 minutes.
Doneness can be measured by more than a toothpick. A digital thermometer inserted into the center should read 200 to 205°F. The top should spring back lightly when tapped, and the kitchen should smell deeply chocolatey. If the center sinks as it cools, it needed a few extra minutes.
Variations and Add-Ins
This loaf welcomes creativity. Keep the base formula, then layer in flavors that play well with chocolate and banana.
For a peanut butter swirl, warm 1/3 cup peanut butter until fluid, then dollop on top of the batter and gently swirl with a knife. A cinnamon-bourbon version is also lovely: add 1 teaspoon cinnamon to the dry mix and 1 tablespoon bourbon to the wet.
Looking for dairy-free? Use an equal amount of thick coconut yogurt and replace butter with more oil. For gluten-free baking, use a high quality 1:1 gluten-free flour blend that includes xanthan gum and extend the bake by 5 to 10 minutes.
After trying the base, consider these mix-ins for your next round.
- Toasted hazelnuts or almonds
- Dried cherries or chopped dates
- White chocolate chunks
- Orange zest
Storage, Freezing, and Serving
Once cool, wrap the loaf tightly in plastic or store in an airtight container. It stays moist at room temperature for 3 days. Refrigeration is not necessary and can dry the crumb unless well wrapped. For longer storage, freeze.
To freeze the whole loaf, wrap in two layers of plastic, then a layer of foil. For slices, freeze on a sheet until firm, then bag. Thaw on the counter, or rewarm a slice in a low oven for 8 to 10 minutes. A gentle toast turns the chocolate just gooey enough for a dreamy breakfast.
Serving ideas are wide open. A smear of salted butter is classic. A spoon of lightly sweetened Greek yogurt adds tang. For a dessert plate, top a warm slice with a scoop of vanilla ice cream and a few raspberries.
Ingredient Science and Smart Swaps
Bananas carry more than sweetness. As they ripen, starch converts to sugar, acidity increases slightly, and pectin weakens. That means better browning, a softer crumb, and a more complex flavor. Bananas also bring potassium and some natural binding, which helps structure.
Cocoa choice changes the profile. Natural cocoa is a bit brighter and fruitier. Dutch process is smoother and darker. This formula is flexible, because the acidity from banana and yogurt gives the baking soda a reliable partner either way. If you love an inky, almost brownie-like color, choose Dutch. If you enjoy a hint of tart cherry and a lighter shade, go natural.
Oil versus butter is a friendly debate. Oil gives more moistness on day two and three. Butter wins on flavor. Using both lets you have your cake and eat it too. The small amount of melted butter provides aroma, while oil locks in tenderness.
Coffee does not make the bread taste like coffee. It lifts chocolate notes in the same way salt sharpens sweetness. If you prefer to skip it, replace with hot water and add 1 extra teaspoon of vanilla to keep the aroma lush.
Sugar balance is deliberate. Brown sugar’s molasses notes complement banana and cocoa, while a bit of white sugar keeps the structure from collapsing. If you reduce sugar, do so modestly. Going below 160 g total will change moisture and browning.
Altitude can affect rise and moisture. At 5,000 feet, reduce baking soda to 3/4 teaspoon, increase flour by 2 tablespoons, and check for doneness about 5 minutes earlier.
Make It a Habit: Ripe Banana Strategy
If bananas ripen faster than your schedule, freeze them. Peel, chunk, and stash in a freezer bag. Thaw in a bowl at room temperature or microwave gently, then drain a tablespoon or two of excess liquid before mashing. The flavor stays excellent, and you can bake on your timeline.
Another routine that helps: measure dry ingredients into a jar for a “mix” you can grab on a busy morning. Flour, cocoa, soda, and salt keep well. Add wet ingredients when you are ready and the loaf is in the oven in minutes.
Troubleshooting and FAQs
Even a forgiving recipe can raise questions. Use these quick fixes to keep your results steady.
- My loaf is gummy in the center: It likely needed more time. Check for 200 to 205°F in the middle, and rest the loaf in the pan for 15 minutes before unmolding.
- The top cracked too much: A crack is normal in quick breads. Excessive splitting often points to an oven that runs hot. Use an oven thermometer and avoid opening the door in the first 40 minutes.
- Dry texture on day one: Overmixing is the usual cause. Fold only until the flour disappears. Also confirm you measured flour accurately. Weighing prevents heavy-handed cups.
- No ripe bananas on hand: Roast yellow bananas on a parchment-lined sheet at 300°F for 15 to 20 minutes until skins turn black. Cool, peel, and proceed.
- I prefer it sweeter: Add 2 tablespoons sugar or use milk chocolate chips. Banana sweetness varies, so adjust to taste next time.
- Can I make it vegan: Yes. Use dairy-free yogurt, replace butter with oil, and swap eggs for 1/2 cup aquafaba or 2 flax eggs. Expect a slightly denser crumb.
- Stuck to the pan: Grease well and use a parchment sling. If it still clings, chill the loaf 20 minutes, then try again. The fats firm up and release more easily.
Warm, chocolatey, tender, and banana-forward. It’s the kind of bake that rewards attention to simple details and welcomes your personal touch. Slice thick, pour some coffee, and enjoy every crumb.
Chocolate Banana Bread with a Rich, Sweet Twist
Course: DessertCuisine: AmericanDifficulty: Easy4
servings10
minutes1
hour290
kcal1
hour10
minutesMoist, rich Chocolate Banana Bread made with ripe bananas and cocoa powder. Easy, delicious, and loaded with chocolate flavor.
Ingredients
1 ½ cups all-purpose flour
1 cup sugar
½ cup unsweetened cocoa powder
1 tsp baking soda
½ tsp baking powder
½ tsp salt
2–3 ripe bananas, mashed
2 eggs
½ cup vegetable oil (or melted butter)
½ cup milk
1 tsp vanilla extract
½ cup chocolate chips (optional but amazing)
Step-by-Step: From Bowl to Pan
- Prep the pan and oven. Heat the oven to 350°F. Grease a 9 by 5 inch loaf pan, then line it with a long strip of parchment that overhangs the long sides. The parchment sling makes removal easy.
- Bloom the cocoa. In a small bowl, stir the cocoa with the hot coffee until glossy and smooth. This quick step amplifies chocolate flavor.
- Whisk the dry ingredients. In a medium bowl, whisk the flour, baking soda, and salt. Set aside.
- Combine the wet ingredients. In a large bowl, whisk the mashed bananas, brown sugar, granulated sugar, eggs, oil, melted butter, yogurt, vanilla, and the cocoa mixture until well combined and smooth. No need for a mixer.
- Bring it together. Sprinkle the dry mixture over the wet mixture. Fold with a rubber spatula until you see only a few wisps of flour. Fold in the chocolate and nuts if using. Stop as soon as the batter looks uniform. Overmixing toughens the loaf.
- Bake. Scrape the batter into the prepared pan and smooth the top. For a classic split down the center, drag a buttered knife along the length of the batter to make a shallow groove. Bake 55 to 70 minutes, until a toothpick inserted in the center comes out with a few moist crumbs. If the top browns too quickly, tent loosely with foil for the final 10 minutes.
- Cool. Let the loaf cool in the pan for 15 minutes, then lift it out with the parchment and place it on a rack. Cool at least 1 hour before slicing. Warm bread can crumble, so patience pays off.
Notes
- Use very ripe bananas for maximum sweetness.
Add walnuts for crunch.
Add extra chocolate chips on top before baking.