



no bake cake pops recipe fans, your snack-loving heart is about to get very smug because these bite-sized treats skip the oven, come together with simple ingredients, and somehow disappear faster than you can say, “Who ate the last one?” If you’ve been craving a fun dessert without baking an entire cake, you’re in the right place. This guide covers everything from shaping and coating to storing and troubleshooting, plus a few clever tricks that make your cake pops look bakery-worthy without the bakery-level stress. Grab a mixing bowl, clear a little fridge space, and prepare for tiny desserts with huge personality.
Why This Recipe is Awesome
This no bake cake pops recipe gives you rich, creamy cake pops without heating up the kitchen. That’s already a win.
Instead of wrestling with baking times and crumbly cake layers, you mix, chill, dip, and decorate. They’re perfect for birthdays, holidays, lunchboxes, or random Tuesday evenings when your sweet tooth starts making unreasonable demands. Better yet, you can customize every batch with different coatings, sprinkles, or extracts and pretend you’re running a tiny dessert shop from your kitchen.
Ingredients You’ll Need
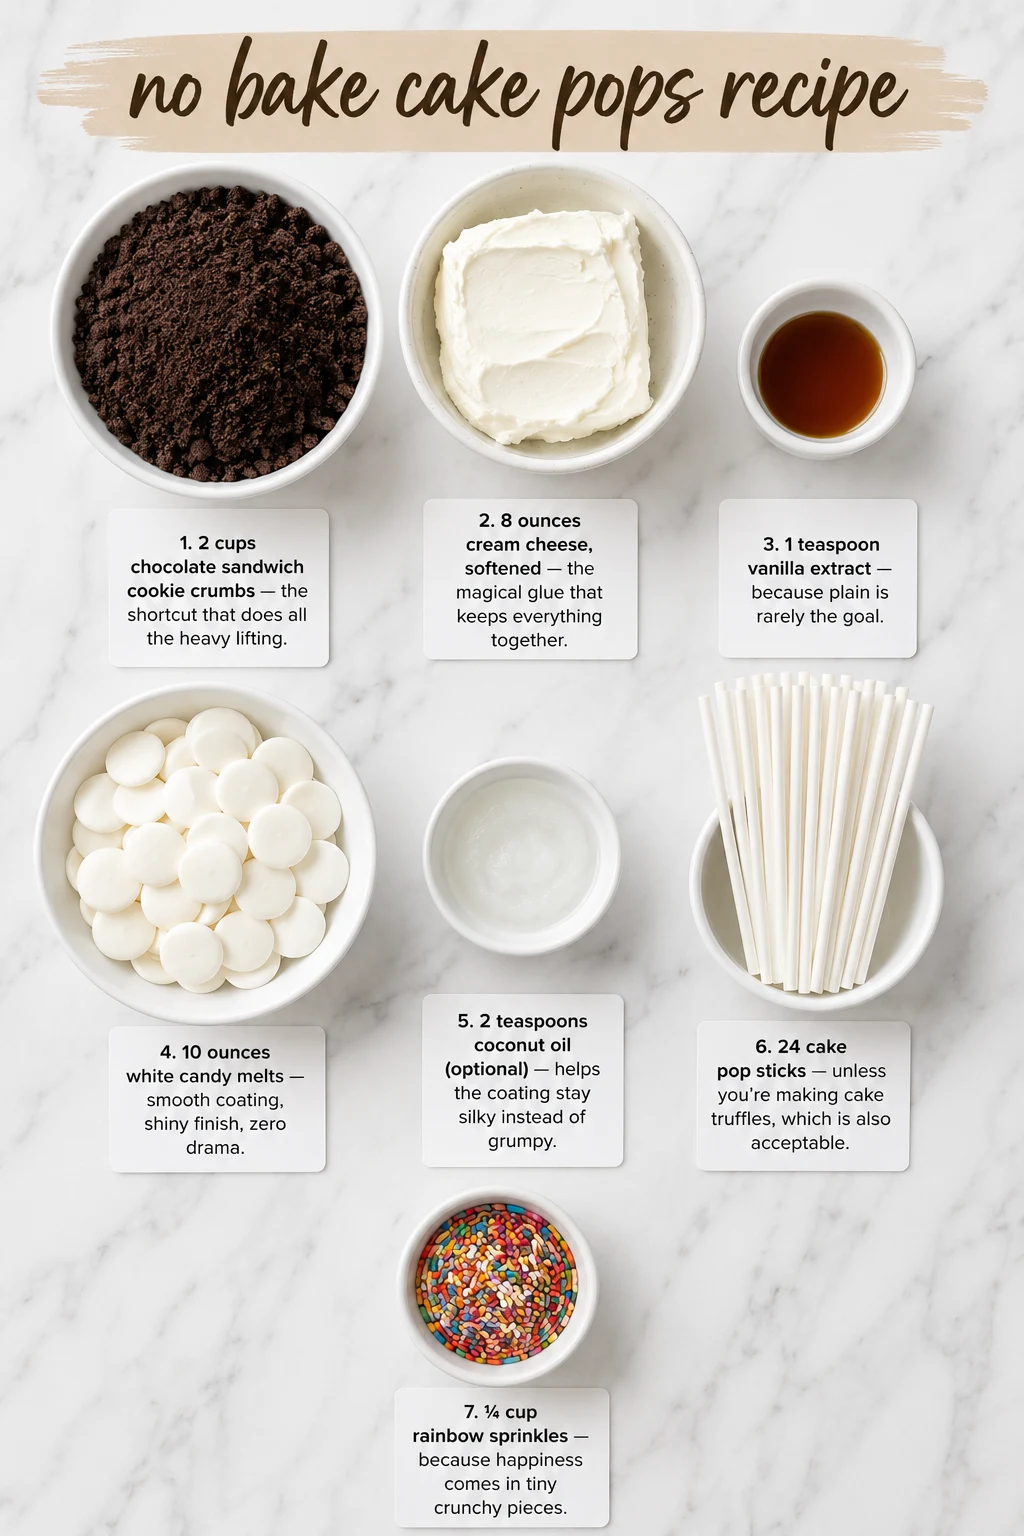
- 2 cups chocolate sandwich cookie crumbs — the shortcut that does all the heavy lifting.
- 8 ounces cream cheese, softened — the magical glue that keeps everything together.
- 1 teaspoon vanilla extract — because plain is rarely the goal.
- 10 ounces white candy melts — smooth coating, shiny finish, zero drama.
- 2 teaspoons coconut oil (optional) — helps the coating stay silky instead of grumpy.
- 24 cake pop sticks — unless you’re making cake truffles, which is also acceptable.
- ¼ cup rainbow sprinkles — because happiness comes in tiny crunchy pieces.
Step-by-Step Instructions
- Crush the chocolate sandwich cookies into fine crumbs using a food processor or by sealing them in a zip-top bag and smashing them with a rolling pin. Stir in the softened cream cheese and vanilla until the mixture forms a smooth dough with no dry spots.
- Scoop about 1 tablespoon of mixture for each pop and roll into smooth balls. Place them on a parchment-lined tray and refrigerate for 30 minutes or freeze for 15 minutes until firm enough to hold their shape.
- Melt the white candy melts in the microwave in 20-second intervals, stirring after each round until completely smooth. If needed, mix in the coconut oil for an easier dipping consistency.
- Dip the end of each cake pop stick about ½ inch into the melted coating before inserting it halfway into a chilled ball. Chill the pops for another 10 minutes so the stick sets securely—this little trick keeps them from sliding off.
- Dip each chilled pop into the melted coating, turning slowly until fully covered. Tap the stick gently against the bowl to remove excess coating instead of shaking it like a maraca.
- Add sprinkles immediately before the coating hardens. Let the pops stand upright in a foam block or cake pop stand until completely set, about 15–20 minutes at room temperature. This no bake cake pops recipe works best when the pops stay chilled until serving.
Common Mistakes to Avoid
- Skipping the chilling time. Warm cake balls love jumping off their sticks.
- Overheating the candy melts. Burnt coating becomes thick and impossible to dip.
- Making giant cake pops. Bigger isn’t better when gravity joins the conversation.
- Adding sprinkles too late. Once the coating hardens, those sprinkles aren’t sticking anywhere.
- Using cold cream cheese straight from the fridge. Soft ingredients mix smoothly and save your arm workout.
Alternatives & Substitutions
This no bake cake pops recipe works with plenty of swaps. Use vanilla sandwich cookies for a lighter flavor or gluten-free sandwich cookies if needed. Replace regular cream cheese with dairy-free cream cheese for a vegan-friendly version, and use dark or milk chocolate melting wafers instead of white candy melts if that’s what your pantry offers. Add peppermint, almond, orange, or coffee extract for easy flavor twists without changing the texture.
For another easy treat, try these no bake brownie bites or whip up a batch of oreo truffles when you’re craving another effortless dessert.
Frequently Asked Questions
How long does a no bake cake pops recipe last?
A properly stored batch stays fresh in an airtight container in the refrigerator for up to 5 days. For the best texture, let them sit at room temperature for about 10 minutes before serving.
Can I freeze no bake cake pops?
Yes. Freeze fully coated cake pops in a freezer-safe container for up to 2 months. Thaw them overnight in the refrigerator before serving to reduce condensation on the coating.
Why do my cake pops fall off the stick?
Cake pops usually fall because they’re too warm, too heavy, or the stick wasn’t dipped into melted coating before insertion. Chilling between steps creates a much stronger hold.
Can I make this no bake cake pops recipe ahead of time?
Absolutely. You can prepare and coat the cake pops up to 2 days before serving, then store them in the refrigerator until you’re ready to enjoy or package them for a party.
🛒 Wilton Candy Melts Bright White Candy & Wilton Treat Pops Cake Pop Sticks, 6 Inch
Everything you need to make this dish perfectly:
As an Amazon Associate I earn from qualifying purchases.
Make It Tonight!
Tiny desserts somehow make every occasion feel a little more fun, and this no bake cake pops recipe proves you don’t need an oven to impress anyone. Keep the flavors classic or decorate each batch with different colors and toppings to match any celebration. Once you master the basic technique, you’ll find yourself making them for birthdays, holidays, bake sales, and every excuse in between. Life’s simply better when dessert comes on a stick.
🍽️ Recipes You Can Try
Loved this one? Here are a few more worth your time.



No bake cake pops recipe
- ✓2 cups chocolate sandwich cookie crumbs — the shortcut that does all the heavy lifting.
- ✓8 ounces cream cheese, softened — the magical glue that keeps everything together.
- ✓1 teaspoon vanilla extract — because plain is rarely the goal.
- ✓10 ounces white candy melts — smooth coating, shiny finish, zero drama.
- ✓2 teaspoons coconut oil (optional) — helps the coating stay silky instead of grumpy.
- ✓24 cake pop sticks — unless you’re making cake truffles, which is also acceptable.
- ✓¼ cup rainbow sprinkles — because happiness comes in tiny crunchy pieces.
- 1Crush the chocolate sandwich cookies into fine crumbs using a food processor or by sealing them in a zip-top bag and smashing them with a rolling pin. Stir in the softened cream cheese and vanilla until the mixture forms a smooth dough with no dry spots.
- 2Scoop about 1 tablespoon of mixture for each pop and roll into smooth balls. Place them on a parchment-lined tray and refrigerate for 30 minutes or freeze for 15 minutes until firm enough to hold their shape.
- 3Melt the white candy melts in the microwave in 20-second intervals, stirring after each round until completely smooth. If needed, mix in the coconut oil for an easier dipping consistency.
- 4Dip the end of each cake pop stick about ½ inch into the melted coating before inserting it halfway into a chilled ball. Chill the pops for another 10 minutes so the stick sets securely—this little trick keeps them from sliding off.
- 5Dip each chilled pop into the melted coating, turning slowly until fully covered. Tap the stick gently against the bowl to remove excess coating instead of shaking it like a maraca.
- 6Add sprinkles immediately before the coating hardens. Let the pops stand upright in a foam block or cake pop stand until completely set, about 15–20 minutes at room temperature. This no bake cake pops recipe works best when the pops stay chilled until serving.
📝 Chef’s Notes
Store leftovers in an airtight container in the refrigerator for best freshness. Let come to room temperature before serving for the best texture and flavor.
Nutrition Information
(per serving)* Estimated values based on typical ingredients — actual nutrition may vary. % Daily Values based on a 2,000 calorie diet.
