


If you love chocolate, you’ll adore the ombre chocolate cake. It’s a mix of rich chocolate and a stunning gradient look.
I tried this cake and was amazed. It’s incredibly moist and has a deep chocolatey flavor. The ombre effect makes it elegant, great for parties or special events.
Key Takeaways
- A moist and rich dessert experience
- Visually stunning with a beautiful ombre effect
- Perfect for special occasions or dinner parties
- Deep, chocolatey flavor that’s sure to satisfy
- A must-try for chocolate lovers
The Magic of Chocolate Gradients in Baking
The ombre effect in cakes has become a sensation. It turns simple desserts into works of art. This trend has won the hearts of bakers and dessert lovers, adding a unique twist to traditional cakes.
What Makes Ombre Cakes Stand Out
Ombre cakes are striking because of their visual appeal. They have a gradual color transition, from dark to light chocolate shades. This not only looks great but also shows off the baker’s skill and creativity.
The technique involves layering cake and frosting to create a seamless gradient. It requires precision and patience. The result is a cake that’s as beautiful as it is delicious.
Key features of ombre cakes include:
- A gradient effect that adds visual appeal
- Precision in layering and frosting
- A showcase of the baker’s creativity and skill
The Rich History of Layered Chocolate Desserts
Layered chocolate desserts have a long history, dating back centuries. They started in traditional European baking. Over time, they’ve evolved with new techniques and ingredients, becoming the sophisticated treats we love today.
From classic Black Forest cake to modern ombre creations, these desserts continue to amaze. They captivate with their complexity and rich flavors.
Notable aspects of layered desserts include:
- Historical roots in European baking traditions
- Evolution over time with new techniques and ingredients
- A wide range of flavors and textures
Essential Ingredients for My Ombre Chocolate Cake
To get the perfect ombre chocolate cake, you need the right ingredients and technique. It’s important to start with the best components for a cake that looks great and tastes amazing.
Selecting Quality Chocolate for Different Intensities
The key to a great ombre chocolate cake is the chocolate. Use high-quality chocolate for the best taste. You’ll need different chocolates for the ombre effect.
Dark chocolate gives a deep flavor, milk chocolate is sweeter, and white chocolate adds creaminess. Choose chocolates with different cocoa content for the gradient.
The Supporting Cast: Flour, Sugar, and Dairy
Other key cake ingredients are important too. Flour gives structure, sugar adds sweetness, and dairy adds moisture. For my cake, I use all-purpose flour, granulated sugar, and whole milk or buttermilk.
The quality of these ingredients matters a lot. Using room temperature dairy can make the batter better, leading to a more even cake.
Equipment and Tools for Success
Having the right baking equipment is key. You’ll need mixing bowls, an electric mixer, measuring cups and spoons, and cake pans. For an ombre cake, you’ll need at least three pans.
Good-quality pans and utensils can make baking easier. Non-stick pans help with cake release, and a digital scale makes measuring more accurate.
Step-by-Step Baking Process
Baking an ombre chocolate cake is a detailed process. It’s achievable for all bakers with the right guidance. Understanding each step is key, from preparing the batter to baking it perfectly.
Preparing Your Cake Batter Base
To begin, prepare your cake batter base. Mix high-quality ingredients like quality chocolate, flour, sugar, and dairy products. Make sure your ingredients are at room temperature for a smooth batter.
Start by creaming butter and sugar until light and fluffy. Then, add eggs one at a time, fully incorporating each before adding the next.
Next, alternate adding dry and wet ingredients. Start and end with dry ingredients. This keeps the batter stable and well mixed.
Creating the Perfect Ombre Effect
To get the ombre effect, you’ll need to color your cake. Divide the batter into parts and mix different amounts of cocoa or chocolate into each. Start with a base batter and adjust the color in each portion.
Achieving Consistent Color Gradients
For a consistent gradient, mix each portion well. Start with a light color and darken it gradually. Use high-quality cocoa powder or chocolate for better color and flavor.
Troubleshooting Common Mixing Issues
Common mixing problems include overmixing and uneven colors. Avoid overmixing and mix each portion the same way. If you see lumps, gently fold the batter.
Baking Times and Temperature Tips
Baking your ombre cake needs precise temperature and time. Preheat to 350°F and bake until a toothpick comes out clean. Watch your cakes closely, as oven temperatures can differ.
Follow these steps and tips to make a beautiful ombre chocolate cake. Remember, practice makes perfect. Don’t worry if your first try isn’t perfect.
Frosting and Decorating Your Ombre Chocolate Cake
Now that your cake layers are ready, it’s time to frost and decorate your ombre chocolate cake. This step brings out its full beauty and taste. You’ll make a silky chocolate buttercream for a smooth canvas.
Making Silky Chocolate Buttercream
To make the chocolate buttercream, you need:
- 1 cup unsalted butter, softened
- 2 cups confectioners’ sugar
- 1/2 cup high-quality cocoa powder
- 2 tablespoons milk or heavy cream
- 1 teaspoon vanilla extract
Start by beating the butter until it’s creamy. Then, add the confectioners’ sugar, cocoa powder, and milk slowly. Beat until it’s smooth and creamy. Add vanilla extract and mix well. This chocolate buttercream is rich and creamy, perfect for your ombre cake.
Assembly Techniques for Clean Layers
Assembling your cake needs patience and technique. Begin by placing a small dollop of chocolate buttercream on your plate. This keeps the cake from sliding.
| Layer | Frosting Amount | Tips |
|---|---|---|
| First Layer | Small dollop | Anchors the cake |
| Between Layers | 1-2 tablespoons | Spread evenly |
| Outer Layer | Generous amount | Smooth with an offset spatula |
Decoration Ideas to Showcase the Ombre Effect
To show off the ombre effect, use a palette knife for textured patterns. You can also add edible decorations like chocolate shavings or sprinkles. For a dramatic look, add chocolate ganache drips down the sides.
Storage and Serving Recommendations
Decorated, your cake can stay at room temperature for up to 3 days in a cool, dry place. For longer storage, refrigerate it. Let it come to room temperature before serving for the best taste and texture.
Conclusion
Ombre chocolate cake is more than just a sweet treat. It’s a visual delight that adds elegance to any event. The gradual color change from light to dark is truly captivating.
With the steps from this article, you can make your own ombre chocolate cake. Choosing the right chocolate and layering it perfectly are key. Each step enhances the cake’s beauty.
Give this recipe a try and see the joy of baking an ombre chocolate cake. The moist, rich layers will make it a hit with chocolate fans.
Don’t forget to share your creations. Seeing your friends and family enjoy this cake is truly rewarding.
FAQ
What is an Ombre Chocolate Cake?
An Ombre Chocolate Cake is a cake with a color gradient. It starts light and gets darker, showing a beautiful ombre effect. This cake is all about chocolate, with different shades.
What type of chocolate is best for Ombre Chocolate Cake?
For the best Ombre Chocolate Cake, use top-notch chocolate. Mix dark, milk, and white chocolate for a stunning color gradient.
Can I use any type of flour for Ombre Chocolate Cake?
You can try different flours, but all-purpose or cake flour is best. They give the cake the right texture and structure.
How do I achieve a smooth ombre effect in my cake?
For a smooth ombre, add coloring or chocolate slowly to the batter. Mix well after each addition. You can also layer different chocolate shades for a gradient effect.
Can I make Ombre Chocolate Cake ahead of time?
Yes, you can make it ahead. Bake the layers and store them in an airtight container. Freeze them for later. Make the frosting ahead too and refrigerate it.
How do I store and serve Ombre Chocolate Cake?
Store it in an airtight container at room temperature or in the fridge. Slice it carefully to keep the ombre look. Serve at room temperature for the best taste and texture.
Print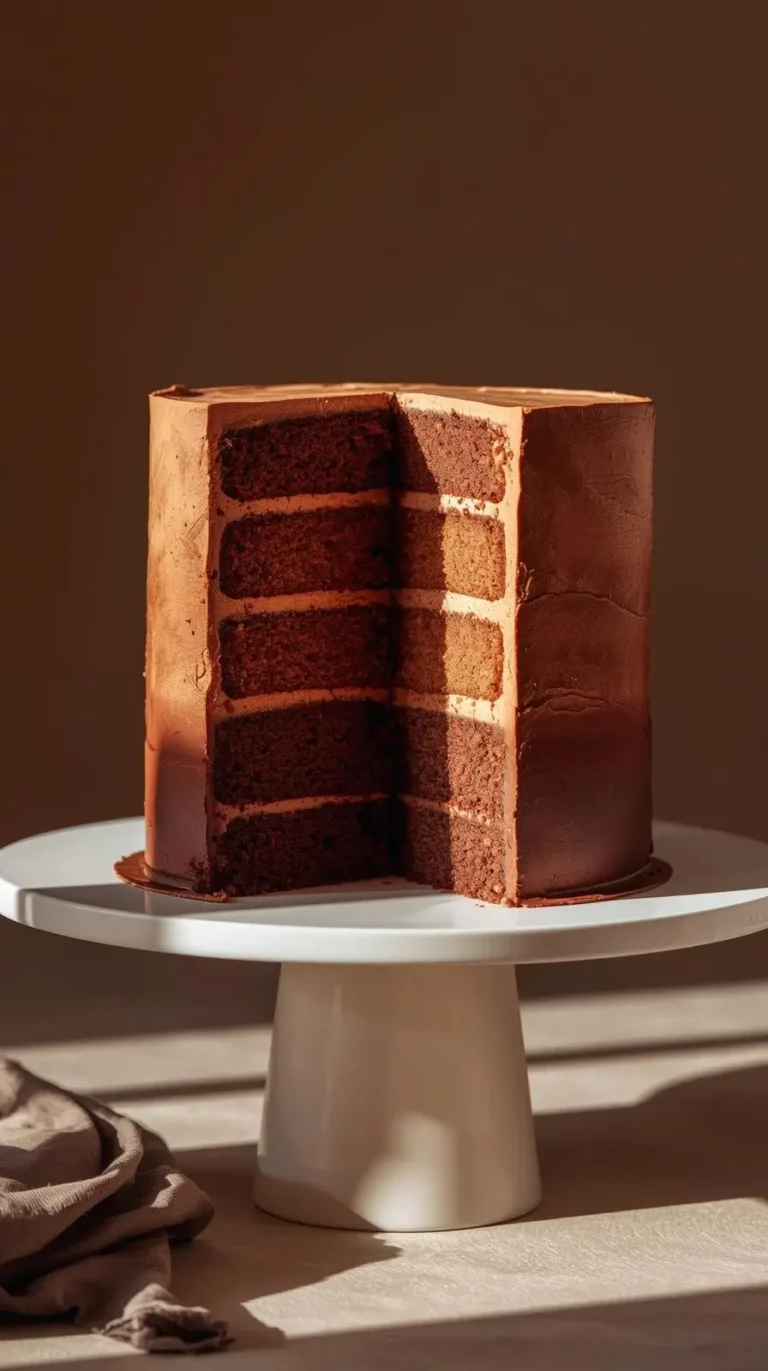
Ombre Chocolate Cake: Moist, Rich, and Beautiful
This Ombre Chocolate Cake features three layers of chocolate cake—light, medium, and dark—frosted with silky chocolate buttercream that transitions beautifully from dark at the base to pale at the top. It’s soft, moist, and visually breathtaking while staying incredibly easy to make.
- Total Time: 50
- Yield: 12 servings
Ingredients
- For the Cake
- 2 cups all-purpose flour
- 2 cups granulated sugar
- ¾ cup unsweetened cocoa powder (divide into 3 portions later)
- 2 tsp baking powder
- 1½ tsp baking soda
- 1 tsp salt
- 2 large eggs
- 1 cup whole milk
- ½ cup vegetable oil
- 2 tsp vanilla extract
- 1 cup boiling water
- For the Chocolate Buttercream
- 2 cups unsalted butter, softened
- 6 cups powdered sugar
- ½ cup unsweetened cocoa powder
- ¼ cup heavy cream
- 2 tsp vanilla extract
- Pinch of salt
Instructions
- Prepare the Cake Layers
Preheat oven to 350°F (175°C). Grease and line three 8-inch cake pans. - Mix Dry Ingredients
In a large bowl, whisk flour, sugar, baking powder, baking soda, salt, and all cocoa powder. - Add Wet Ingredients
Add eggs, milk, oil, and vanilla. Mix until smooth. Slowly add boiling water—batter will be thin. - Create Ombre Layers
Divide batter evenly into 3 bowls. - Leave one bowl as is (dark layer).
- Add 2–3 extra tablespoons of flour to bowl #2 to slightly lighten it.
- Add ¼ cup milk + 2 tbsp flour to bowl #3 to create the lightest layer.
- Bake
Pour each mixture into its own pan. Bake 22–27 minutes or until a toothpick comes out clean.
Cool completely. - Make the Buttercream
Beat butter until creamy. Add powdered sugar gradually.
Add cocoa powder, cream, vanilla, and salt. Whip until fluffy. - Tint Frosting for Ombre
Divide frosting into three bowls: - Dark: add extra cocoa
- Medium: regular frosting
- Light: add a little milk to lighten color
- Assemble
Level cake layers if needed. Place the darkest layer at the bottom, medium in the middle, and lightest on top.
Frost each layer, then smooth the outside, blending the buttercream from dark to light.
Notes
- For a stronger ombre contrast, adjust cocoa levels more dramatically between frostings.
- Chill cake for 20 minutes before smoothing for a cleaner finish.
- Cake stays fresh for 3–4 days when refrigerated.
- Prep Time: 25
- Cook Time: 25
- Category: Dessert
- Method: Baking
- Cuisine: American