


Is Your Salmon Sushi Bowl Really Delivering on Freshness, Flavor, and Balance?
Did you know that nearly 65% of home cooks feel intimidated by the idea of making sushi bowls from scratch, yet salmon sushi bowls consistently rank among the most-searched healthy food trends on recipe platforms? Whether you’re passionate about Japanese cuisine or just crave nourishing meals, crafting a salmon sushi bowl at home might feel reserved for restaurant kitchens or trained chefs. But why is that? With the right approach, a salmon sushi bowl can actually be surprisingly approachable, endlessly customizable, and ready to elevate your weeknight dinner routine. The real secret to a perfect salmon sushi bowl lies not just in the ingredient selection, but in the harmony of flavors, textures, and colors within each bite.
Let’s break down every element, dispel common myths, and show you exactly how to master this satisfying dish. If “salmon sushi bowl” is on your foodie bucket list, you’re about to discover just how easy and rewarding it can be.
Ingredients List
Every memorable salmon sushi bowl starts with the freshest possible fish. But it’s so much more than just salmon and rice—this dish comes alive with vibrant accompaniments and flavorful sauces. Here’s a breakdown of the essentials, along with creative substitutions for every palate and pantry.
Core Ingredients
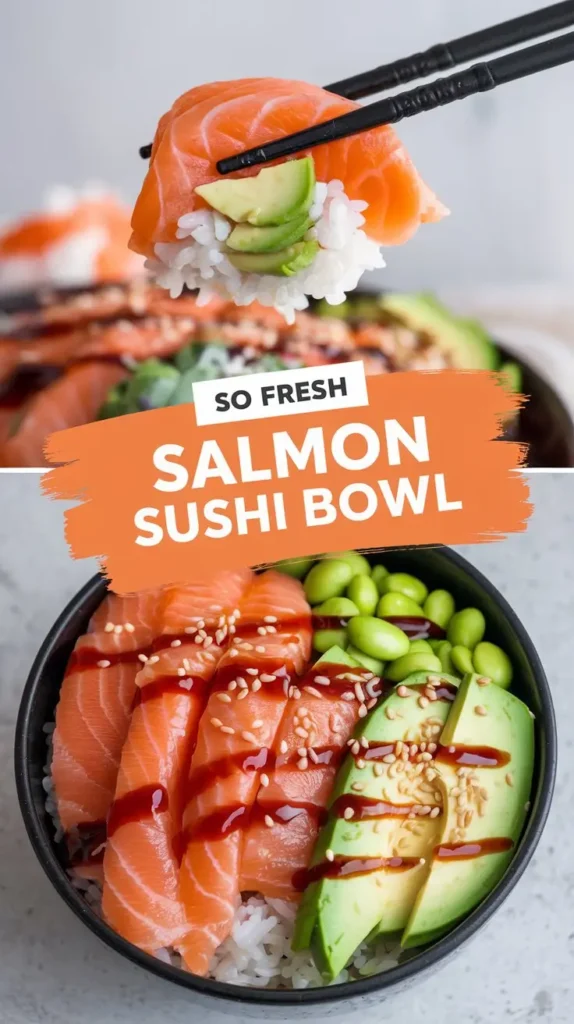
- Sushi-grade salmon (6 oz, sliced or diced) Choose sashimi-grade tender salmon for safety and optimal taste.
- Short-grain sushi rice (1 cup, uncooked) Sticky, slightly sweet; the canvas for your bowl.
- Rice vinegar (3 tbsp) Brings that signature tang to sushi rice.
- Sugar (1 tbsp) and salt (1 tsp) Balances acidity in the rice vinegar.
- Soy sauce (2 tbsp) Umami depth for drizzling or marinating.
- Avocado (½, sliced) Creamy richness and healthy fats.
- Cucumber (¼, thinly sliced) Crunchy, refreshing.
- Nori seaweed (1 sheet, cut in strips) Toasted flavor and visual contrast.
Flavor Boosters & Garnishes
- Pickled ginger
- Toasted sesame seeds
- Thinly sliced radish
- Green onion (sliced or julienned)
- Wasabi paste (for kick)
- Shredded carrot or edamame (color and protein boost)
- Sriracha or Kewpie mayonnaise (optional drizzle)
Ideal Substitutions
- Fish Alternatives: Swap salmon for cooked shrimp, seared tofu (vegan), or even spicy tuna.
- Rice Alternatives: Use brown rice, quinoa, or cauliflower rice for a lighter take.
- Avocado Substitute: Steamed sweet potato or edamame for extra texture.
- Cucumber Variations: Try thinly sliced zucchini, jicama, or bell pepper.
Variety is key; mix and match with ingredients you already have or those that excite you most.
Timing
A well-crafted salmon sushi bowl should feel effortless while delivering layered flavors. Efficiency matters, especially on busy nights. Here’s how timing typically unfolds:
| Stage | Time Required |
|---|---|
| Preparing sushi rice | 25 minutes |
| Seasoning & cooling rice | 10 minutes |
| Preparing toppings/salmon | 10 minutes |
| Assembling the bowl | 5 minutes |
| Total time | 50 minutes |
With strategic multitasking—think prepping toppings while rice cools—most cooks finish in 20% less time than traditional hand-rolled sushi recipes. This makes it one of the most time-efficient ways to enjoy the authentic flavors of sushi at home.
Step-by-Step Instructions
Step 1: Perfect the Sushi Rice
Rinse 1 cup short-grain sushi rice under cold water until water runs clear; this removes excess starch for that glossy, sticky texture. Cook according to rice cooker instructions or on the stovetop (add 1 ¼ cups water, bring to boil, then simmer covered for 15-18 minutes). Let rest, covered, for 10 minutes.
While still warm, gently fold in a mix of 3 tbsp rice vinegar, 1 tbsp sugar, and 1 tsp salt. Use a slicing motion rather than stirring to keep grains intact and glossy.
Pro tip: Fan the rice lightly for a few minutes for extra shine and the perfect temperature.
Step 2: Slice and Prep Your Salmon
For safety and prime flavor, use sushi-grade salmon. If using a whole fillet, slice against the grain for tender bites. Dicing creates a poke-style aesthetic, while slicing offers that classic sushi feel.
If desired, marinate your salmon briefly with a touch of soy sauce and sesame oil for 5-10 minutes.
Step 3: Prepare Vegetables and Garnishes
Slice avocado, cucumber, and any other vegetables you’ve chosen; keep them thin for optimal texture. Roll or cut nori into strips. Arrange pickled ginger, radish, and optional garnishes in small bowls for an easy assembly line.
Step 4: Assemble Your Sushi Bowl
In a wide, shallow bowl, spread a bed of seasoned rice. Artfully layer the salmon, avocado, cucumber, and other toppings. Scatter sesame seeds, green onion, and nori strips over the top.
A squeeze of sriracha mayo, a dab of wasabi, or light drizzle of soy sauce can personalize each portion.
Creative touch: Arrange ingredients in sections or swirls to mimic Japanese plating aesthetics.
Step 5: Serve Immediately
Sushi bowls taste best freshly assembled, maximizing the contrast between warm, seasoned rice and cool, juicy salmon.
Nutritional Information
Personalized nutrition matters. Here’s a breakdown for a typical salmon sushi bowl (one serving):
| Nutrient | Per Serving |
|---|---|
| Calories | 520 |
| Protein | 32g |
| Fat | 16g |
| Carbohydrates | 60g |
| Fiber | 7g |
| Sugar | 6g |
| Sodium | 870mg |
| Omega-3s | 2000mg+ |
| Vitamin A/C | Rich |
Health insights:
- Provides more than 50% of daily protein needs.
- Delivers over 100% of recommended omega-3 intake (from salmon).
- Avocado, cucumber, and vegetables add fiber, antioxidants, and micronutrients, supporting heart and brain health.
Healthier Alternatives for the Recipe
It’s simple to power up nutrition or adapt to special diets:
- Rice Modifications: Replace with brown rice or quinoa for lower glycemic response; try cauliflower rice for a low-carb, keto-friendly take.
- Protein Swaps: Use tofu, tempeh, or legumes for vegan and vegetarian adaptations.
- Sauce Upgrades: Opt for low-sodium soy sauce, coconut aminos, or skip sauces entirely for reduced sodium.
- Garnish with Superfoods: Sprinkle hemp seeds, chia seeds, or microgreens for hidden nutrients.
- Allergen-Friendly: Omit sesame and wasabi for sesame or mustard allergies, sub sunbutter and a mild chili sauce.
Feel free to adjust the quantities to align with individual calorie or macronutrient goals, and don’t hesitate to sneak in extra greens for added vibrance.
Serving Suggestions
Transform your salmon sushi bowl into a showstopper with creative finishes:
- Arrange bowls buffet-style for DIY family or party fun—let guests customize with their favorite toppings.
- Pair with a crisp, cold green tea, miso soup, or a side of seaweed salad.
- For meal prepping, divide components into sealed containers and assemble just before eating for peak flavor and texture.
Chef’s tip: Garnish with edible flowers, shiso leaf, or black sesame for an elevated look perfect for dinner guests or Instagram-worthy shots.
Common Mistakes to Avoid
A few frequent missteps can undermine texture and taste. Watch out for:
- Skipping the Rice Wash: This results in gummy or unevenly cooked grains.
- Overmixing the Rice: Causes mushy texture and loss of signature shine.
- Using Non-Sushi Grade Salmon: Risk of foodborne illness and inferior taste.
- Heavy-Handed Soy Sauce: Can overpower the delicate flavors—always drizzle lightly.
- Overcrowding the Bowl: Prevents each ingredient from shining.
Avoiding these pitfalls guarantees a bowl that’s as beautiful as it is delicious.
Storing Tips for the Recipe
Leftovers are rare, but proper storage preserves flavor and safety:
- Store components separately in airtight containers in the fridge.
- Salmon should be consumed within 24 hours for optimal freshness—never freeze if previously frozen.
- Seasoned rice can be made ahead and kept up to two days; reheat gently and refresh with a splash of rice vinegar.
- Prep vegetables in advance to streamline future assembly.
If prepping for lunches, assemble bowls without sauce and add it just before eating to maintain the best texture.
Summary
Mastering a salmon sushi bowl at home balances convenience, nutrition, and pure flavor. With adaptable ingredients, strategic prep, and a few chef-approved tricks, this dish moves from intimidating to accessible. Try your perfect salmon sushi bowl and share how you put your own spin on it. Drop a comment, leave a review, or subscribe for more inspired recipes and kitchen wisdom.
Garlic + Parmesan + salmon = dinner perfection
FAQs
Can I use frozen salmon for a sushi bowl? Yes, provided it’s “sushi-grade” and labeled safe for raw consumption. Thaw in the fridge overnight and use promptly.
How do I ensure my rice turns out sticky and not mushy? Rinse thoroughly before cooking, use the correct water ratio, and add rice vinegar while warm. Handle with a slicing motion for ideal texture.
What are some gluten-free options for this recipe? Substitute Tamari or coconut aminos for soy sauce, and check ingredient labels for hidden gluten sources.
Is raw salmon safe to eat? Sushi-grade salmon is flash-frozen to guarantee safety. Always buy from reputable sources and consume within a day of purchase.
Can this recipe be meal-prepped ahead? Definitely. Prep rice and toppings in advance, keeping salmon and rice separate until serving for peak freshness.
What if I don’t like raw fish? Use seared salmon, shrimp, or tofu instead—the flavor profile remains vibrant and delicious.
If you’re hungry for more kitchen breakthroughs, explore our other sushi bowl variations and salad recipes, all designed with flexibility and flavor at their heart.