


What if I told you that pulsing oats for just 5 seconds can cut cookie spread by up to a third and create that signature crackly top you see on bakery trays? That tiny tweak, paired with the right icing thickness, turns iced oatmeal cookies from ordinary to unforgettable.
Introduction
Most bakers assume oatmeal cookies are foolproof and icing is an afterthought. The truth is, two small decisions control everything: the grind of your oats and the glaze-to-milk ratio. When those two align, you get the crisp edge, chewy center, and the delicate veil of icing that sets into a faintly glossy crust.
This recipe balances texture and sweetness so each bite starts with a cool, sweet snap and moves into warm spice and buttery oats. It’s built for consistency and busy schedules, and it adapts well to gluten-free or dairy-free kitchens.
Ingredients List
A well-built cookie starts with balance: enough fat for tenderness, enough oats for chew, and a glaze that kisses the surface without drowning it.
Base
- 2 1/4 cups old-fashioned rolled oats (225 g), briefly pulsed for better texture
- Sub: quick oats for a slightly softer cookie; reduce pulsing time
- 1 1/4 cups all-purpose flour (160 g)
- Sub: 1:1 gluten-free baking flour for a GF version
- 1 teaspoon baking soda
- 1/2 teaspoon fine sea salt
- 1 1/2 teaspoons ground cinnamon
- 1/4 teaspoon ground nutmeg
- 3/4 cup unsalted butter, softened (170 g)
- Sub: plant-based stick butter for dairy-free
- 3/4 cup packed light brown sugar (150 g)
- 1/3 cup granulated sugar (65 g)
- 1 large egg, room temperature
- Sub: 1 flax egg for egg-free: 1 tablespoon ground flax + 3 tablespoons water, rested 5 minutes
- 2 teaspoons pure vanilla extract
- 2 tablespoons milk (dairy or plant-based) to help hydrate oats
Icing
- 2 cups powdered sugar, sifted (240 g)
- 2 to 3 tablespoons milk (dairy or plant-based)
- 1/2 teaspoon vanilla extract
- Tiny pinch of salt to balance sweetness
Flavor boosters you can add
- 1/2 cup chopped toasted pecans or walnuts for crunch
- 1/2 cup finely chopped dried apples or raisins for a classic twist
- Orange zest for a bright aroma
Why pulse the oats: A few quick bursts in a food processor increases surface area and hydration, which encourages a craggier top and a tender interior. You’re not making oat flour, just shortening the flakes slightly.
Timing
- Prep: 20 minutes
- Bake: 10 to 12 minutes per tray
- Cool and ice: 25 minutes
- Total: about 55 minutes from start to finish
That’s roughly 15 to 25 percent faster than many iced oatmeal cookie recipes that rely on mandatory dough chilling. The brief oat hydration in this method gives you control without a long pause in the middle.
Step-by-Step Instructions
Step 1: Prep the oats for the crackly top
Pulse the rolled oats in a food processor with 4 to 6 quick bursts. You want most flakes shortened by half while still visible. Overprocessing leads to cakier cookies, so stop well before a powder forms.
Tip: If you only have quick oats, give them 1 to 2 short pulses or skip the processor.
Step 2: Whisk the dry ingredients
In a medium bowl, whisk flour, baking soda, salt, cinnamon, and nutmeg. This helps even leavening and avoids salty pockets.
Pro move: If your spices are older than a year, increase cinnamon by 1/4 teaspoon for a vivid aroma.
Step 3: Cream butter and sugars to airy, not fluffy
In a large bowl or stand mixer, beat butter, brown sugar, and granulated sugar on medium speed for 2 to 3 minutes until creamy and slightly lighter in color. You’re aiming for small air bubbles, not a fully whipped texture.
Data tip: Over-creaming traps too much air and can cause excess spread. Two to three minutes is the sweet spot for this dough.
Step 4: Add wet ingredients and hydrate
Beat in the egg and vanilla until just combined. Mix in the milk. The mixture may look slightly loose. That’s ideal.
Now stir in the pulsed oats by hand and let the mixture sit for 5 to 10 minutes. Oats absorb some moisture, tightening the dough before flour goes in. A short rest now means less mandatory chilling later.
Step 5: Bring it together
Fold in the dry ingredients until no streaks of flour remain. Stop the moment it comes together. Overmixing toughens cookies.
If adding nuts or dried fruit, fold them in gently at the end.
Texture check: The dough should be thick and slightly tacky, not sticky-wet. If it feels too loose, rest it 5 more minutes. If still loose, add 1 tablespoon flour.
Step 6: Portion and bake
Heat the oven to 350°F (175°C). Line two baking sheets with parchment.
Scoop 2 tablespoons of dough per cookie, leaving 2 inches between mounds. For neater rounds, roll lightly between your palms. Bake 10 to 12 minutes until edges set and centers look a touch underdone. They’ll finish setting on the tray.
Batch note: If your kitchen runs warm, park the bowl in the fridge between batches to keep spread consistent.
Step 7: Cool for the ideal icing grip
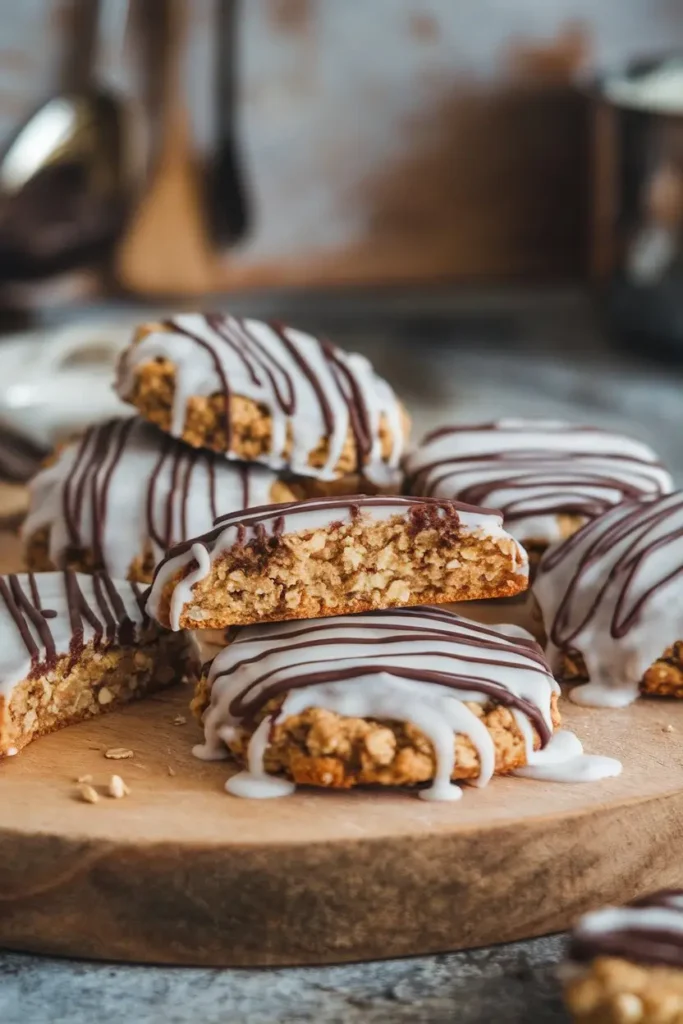
Let cookies rest on the sheet for 5 minutes, then transfer to a wire rack. Cool completely before icing. Warm cookies melt icing and lose that faintly crackled look.
Step 8: Mix the icing to “ribbon stage”
Whisk powdered sugar with 2 tablespoons milk, vanilla, and a pinch of salt. The ideal glaze forms a ribbon that disappears back into the bowl in 2 to 3 seconds. Too thick cracks harshly; too thin soaks in and disappears.
Micro-adjust:
- Too thick: add milk 1 teaspoon at a time
- Too thin: add powdered sugar 1 tablespoon at a time
Step 9: Dip for the signature finish
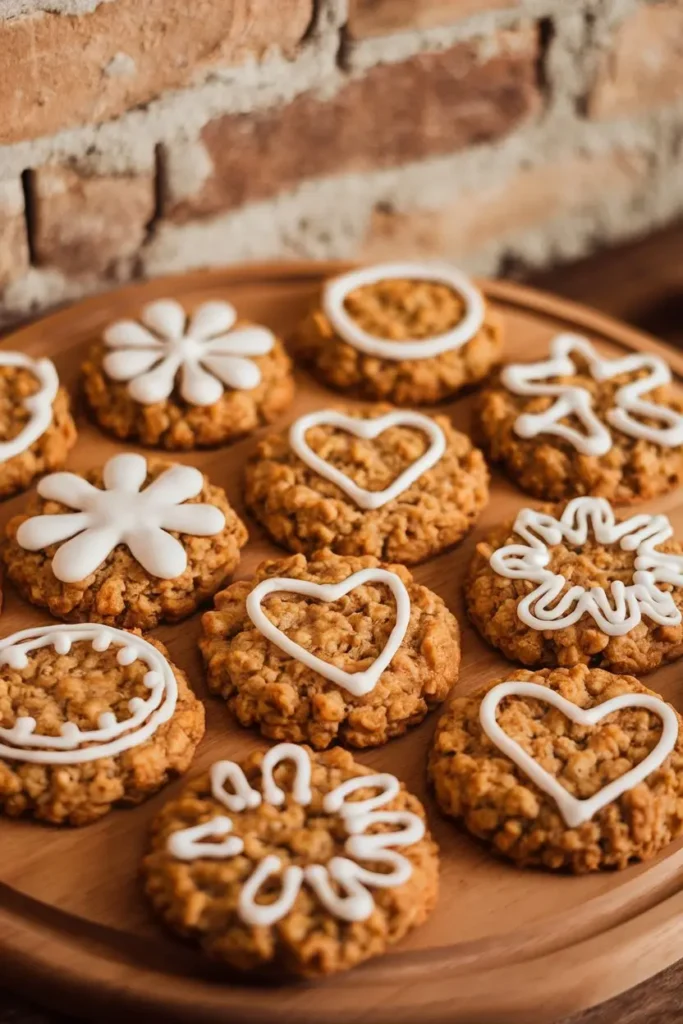
Hold each cooled cookie by the edges and dip the top into the icing. Lift, let excess drip for 2 seconds, then flip upright and lightly skim the top across the bowl’s rim to remove any heavy puddles. Set on a rack. The glaze will set in 15 to 25 minutes.
Look for the faint marbled lines across the top. That’s your bakery finish.
Step 10: Taste, adjust, repeat
Bake one test cookie from the first tray. If it spreads more than you like, chill the remaining dough 15 minutes. If it’s too thick, add 1 teaspoon milk to the dough and stir to bring back moisture.
Nutritional Information
Based on 24 cookies, plain icing, no add-ins. Actual values vary by brand.
| Nutrient | Per Cookie (approx.) |
|---|---|
| Calories | 215 |
| Fat | 8 g |
| Saturated Fat | 5 g |
| Carbohydrates | 33 g |
| Sugars | 20 g |
| Fiber | 2 g |
| Protein | 3 g |
| Sodium | 140 mg |
Data insight: Old-fashioned oats contribute about 4 g fiber per 40 g serving. Even with a dessert-style cookie, that bump supports satiety compared to cookies made only with refined flour.
Healthier Alternatives for the Recipe
Small shifts can keep flavor high while trimming sugar or boosting fiber.
- Reduce sugar: Cut granulated sugar to 1/4 cup and keep brown sugar at 3/4 cup. Sweetness drops slightly, chew stays solid.
- Whole grain nudge: Swap 1/3 cup flour for white whole wheat flour. Texture remains tender, flavor takes on a gentle nuttiness.
- Oil-based dairy-free: Use 2/3 cup neutral oil plus 1 tablespoon water instead of butter. Cookies bake up crisper at the edge with a clean finish.
- Egg-free: Use a flax egg and add 1 extra tablespoon milk to maintain moisture.
- Lower sugar icing: Use 1 1/2 cups powdered sugar and rely on a thicker dip for coverage. You’ll save roughly 8 g sugar across two cookies.
- Gluten-free: Use certified gluten-free oats and a quality 1:1 baking flour. Add 1/4 teaspoon xanthan gum only if your blend lacks it. Chill the dough 20 minutes for tidier edges.
Flavor-forward swaps that still feel classic
- Cinnamon-maple glaze: Replace milk with maple syrup in the icing. Reduce vanilla to 1/4 teaspoon.
- Orange-cardamom cookie: Replace nutmeg with 1/4 teaspoon cardamom; add 1 teaspoon orange zest.
Serving Suggestions
- Coffee pairing: A medium roast with caramel notes is a natural match. The acidity brightens the icing while the oats hold their own.
- Breakfast cookie plate: Serve with Greek yogurt and berries for a weekend treat.
- Ice cream sandwiches: Fill with vanilla or salted caramel ice cream. Freeze 15 minutes so the icing sets back up after assembly.
- Office snack box: Wrap cookies individually in parchment for tidy sharing. The icing holds firm, even in transit.
- Holiday tray: Add a second glaze option flavored with maple or espresso for contrast.
Personal tip: For photo-worthy marbling, dip half the cookies, then streak the remaining glaze with 1 teaspoon of strong coffee and dip the rest. Two tones, zero extra work.
Common Mistakes to Avoid
- Skipping the oat pulse: Whole flakes can cause uneven spread and a bumpier, less cohesive surface. A few quick pulses make the dough more predictable.
- Over-creaming butter and sugar: More than 3 minutes whips in excess air. Cookies puff, then collapse. Keep it to a gentle cream.
- Icing warm cookies: The glaze turns glassy and then vanishes into the crumb. Always cool fully.
- Guessing the glaze thickness: Use the 2 to 3 second ribbon test. Precision here controls the visual finish.
- Overbaking: Pull them when edges set and centers look slightly soft. Residual heat finishes the bake without turning the centers dry.
- Skipping the short rest after adding oats: A brief soak improves structure and reduces spread without a long chill.
- Using instant oats: They drink up liquid aggressively and can create a mealy bite. Old-fashioned oats give the right texture.
Storing Tips for the Recipe
Room temperature
- Store fully cooled, glazed cookies in an airtight container at cool room temp for up to 5 days. Add a small piece of bread to regulate moisture if your kitchen is dry.
Freezer
- Unbaked dough balls: Scoop, flash-freeze on a tray, then bag for up to 2 months. Bake from frozen at 350°F, adding 1 to 2 minutes.
- Baked cookies, unglazed: Freeze up to 2 months. Thaw at room temp and glaze fresh for that just-set finish.
- Baked cookies, glazed: Freeze in layers separated by parchment. Thaw uncovered to prevent condensation from softening the glaze.
Make-ahead strategy
- Mix the dry ingredients in a labeled jar.
- Pulse oats and store in a zip-top bag.
- On bake day, you’re 10 minutes from scooping.
Quick Recap and Try It
Chewy centers, crisp edges, and a thin, glossy icing come from three moves: pulse the oats briefly, rest the dough for a few minutes, and aim for a 2 to 3 second ribbon glaze. Bake a test cookie, adjust spread, and dip with confidence. Try it today, then leave a review or comment and subscribe for more smart bakes.
FAQs
How do I get that classic crackled icing look?
Dip only the top of each cooled cookie in a thin glaze that falls back into the bowl in 2 to 3 seconds. Let excess drip, then set the cookie on a rack. As it dries, fine lines appear and the surface sets glossy.
Can I skip the food processor if I don’t have one?
Yes. Use old-fashioned oats as-is and let the dough rest 15 minutes before baking. The cookies will have a slightly rougher surface but still taste great.
My cookies spread too much. What should I tweak?
Chill the remaining dough for 15 minutes. Or add 1 tablespoon flour to the bowl and mix lightly. Make sure your butter started at cool room temperature, not overly soft or melted.
What if the icing is too sweet?
Add a pinch more salt and a few drops of lemon juice. Or switch to a maple glaze with 1 1/2 cups powdered sugar and 2 to 3 tablespoons maple syrup for deeper flavor at a lower sweetness perception.
Can I make them gluten-free?
Use certified gluten-free oats and a 1:1 baking flour. If your blend lacks xanthan gum, add 1/4 teaspoon. For neat edges, chill the dough 15 to 20 minutes before baking.
How long does the glaze take to set?
Usually 15 to 25 minutes at room temperature. If your kitchen is humid, allow up to 35 minutes. Avoid stacking until the surface dries to the touch.
Is chilling the dough required?
Not with this formula. The short oat hydration step reduces spread. Chill only if your kitchen is warm or your test cookie spreads more than you prefer.
Can I reduce the sugar by a lot without ruining texture?
Cutting about 20 percent works well. Go beyond that and cookies may turn dry. If you want a deeper flavor with less perceived sweetness, switch some granulated sugar to coconut sugar and keep the brown sugar for moisture.
Why are my cookies dry the next day?
Overbaking is the usual culprit. Next time, pull at the first sign of set edges and soft centers. Store with a small piece of bread in your container to maintain tenderness.
What’s the best way to package these for gifting?
Let the glaze dry fully, then layer cookies between parchment in a snug tin. Add a silica gel packet if shipping to a humid climate, and include a flavor card with the spice and icing details.