


What’s Behind the Popularity of Brownie Bites? The Science of Temptation
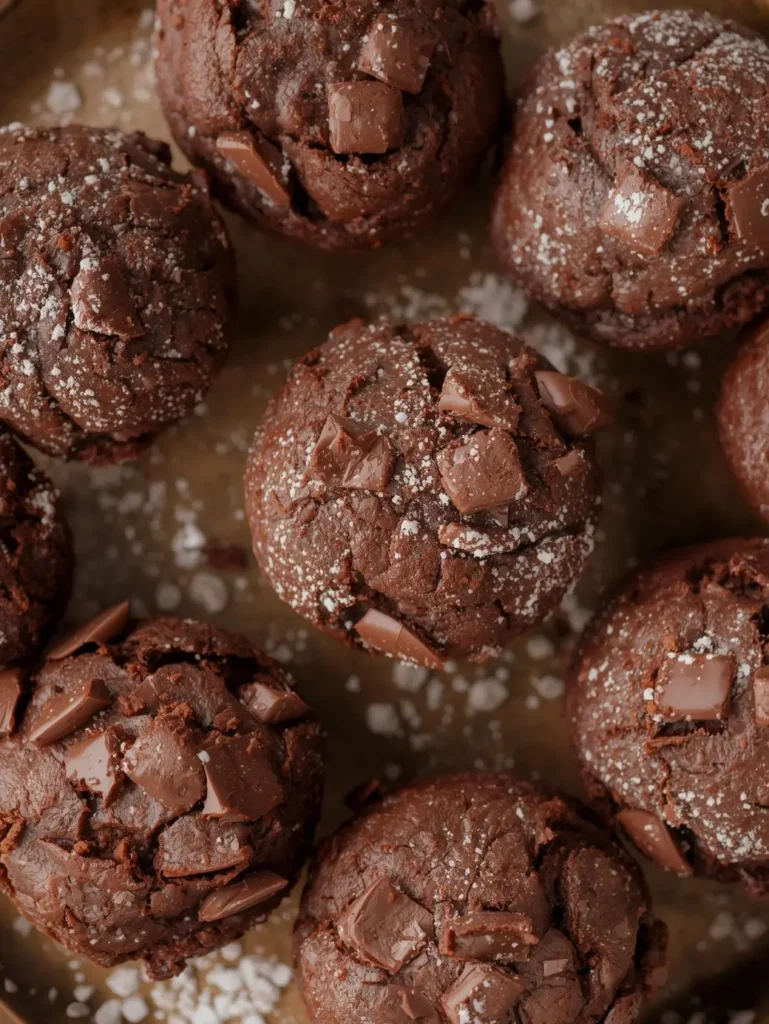
Did you know that over 65% of home bakers say they prefer “bite-sized” desserts when hosting gatherings? While full-size brownies will always have a place at the dessert table, the rise in popularity of brownie bites seems unstoppable—and for good reason. These perfectly portioned treats strike a balance between indulgence and moderation, making them the go-to choice for everything from parties to after-dinner cravings. Whether you’re an experienced baker or just dipping your toes into the world of homemade desserts, this brownie bites recipe, highlighted by a rich chocolate flavor, fudgy texture, and unforgettable aroma, will change the way you think about brownies forever.
When it comes to versatility, flavor customization, and sheer crowd-pleasing potential, brownie bites check all the boxes. This post unpacks everything you need for a showstopping batch—from precise ingredient selections to easy storage recommendations. If you’ve been searching for the ultimate brownie bites recipe or curious about nutritional adjustments, you’re in exactly the right spot.
Ingredients List
Building a memorable batch of brownie bites starts with quality, carefully chosen ingredients. Let’s look at what you’ll need:
- 1/2 cup (1 stick) unsalted butter, melted: For a buttery backbone that carries all the chocolate notes. Substitute with coconut oil for a subtle tropical aroma.
- 3/4 cup granulated sugar: Classic sweetness, but coconut sugar works for a caramel undertone.
- 2 large eggs: Help create that chewy, fudgy interior. Vegan? Use flax eggs (2 tbsp ground flaxseed + 5 tbsp water, mixed and set aside).
- 1 tsp pure vanilla extract: Adds complexity and warmth.
- 1/3 cup unsweetened cocoa powder: Dutch-processed cocoa creates a deeper, richer chocolate punch.
- 1/2 cup all-purpose flour: Keeps things light but chewy—swap for gluten-free blend if needed.
- 1/4 tsp salt: Balances the sweetness and pulls all flavors together.
- 1/2 cup mini chocolate chips or chopped chocolate: Melty pools in every bite, or try peanut butter chips for a twist.
- Optional add-ins: Chopped walnuts, dried cherries, toffee bits, or even a pinch of espresso powder for depth.
Sensory tip: Always sift cocoa powder and flour for a satiny texture.
Timing
Efficiency matters in most kitchens, so here’s a breakdown of what you can expect:
| Step | Time Required |
|---|---|
| Prep Time | 10 minutes |
| Mixing/Batter Assembly | 5 minutes |
| Baking Time | 12-15 minutes |
| Cooling Time | 10 minutes |
| Total Time | ~30-35 minutes |
Compared to traditional brownie recipes—typically stretching around 45-60 minutes—brownie bites are up to 40% faster, thanks to their smaller size and speedy cooling.
Step by step instructions
Step 1: Prepare Your Pan and Preheat
Start by preheating your oven to 350°F (175°C). Grab a mini muffin tin (24-cup works best) and lightly grease each cup with nonstick spray or melted butter. This simple prep step prevents any sticking, making cleanup a breeze and ensuring each brownie bite releases perfectly.
Tip: Line with mini cupcake liners for fuss-free batch removal.
Step 2: Melt Butter and Combine Wet Ingredients
In a microwave-safe bowl, melt the butter until just liquid—about 30 seconds. Whisk together with the sugar until glossy and thick. Add in eggs and vanilla, mixing vigorously to create a smooth, slightly pale mixture.
Actionable tip: Beating the eggs and sugar thoroughly will give your brownie bites that crinkly, bakery-style top.
Step 3: Sift and Mix in Dry Ingredients
In a separate bowl, sift together cocoa powder, flour, and salt. Gradually add this to your wet mixture, folding gently with a spatula until just combined. Avoid over-mixing; stopping once no dry streaks remain ensures tender results.
Extra tip for fudgy brownies: Stop mixing as soon as the flour disappears for the right density.
Step 4: Add Chocolate Chips and Optional Extras
Fold in your mini chocolate chips, distributing them evenly. If you’re craving a bolder texture or flavor, now’s the perfect time to toss in nuts or a swirl of your favorite nut butter.
Step 5: Fill, Bake, and Test
Spoon the batter into each mini muffin cup, filling about 3/4 full. Place the tray in the oven and bake for 12-15 minutes. Brownie bites are done when the tops look set and a toothpick inserted into the center comes out with a few moist crumbs.
Consistency check: For gooier bites, lean closer to 12 minutes; for cakier, aim for 15.
Step 6: Cool and Release
Allow the brownie bites to cool in the pan for 10 minutes before gently removing them. Set on a wire rack to let the centers firm up and flavors intensify.
Nutritional Information
These numbers reflect an average serving of one brownie bite. Exact values may vary based on ingredient choices or substitutions.
| Nutrient | Per Bite (approx.) |
|---|---|
| Calories | 90 |
| Total Fat | 5g |
| Saturated Fat | 3g |
| Cholesterol | 20mg |
| Sodium | 45mg |
| Total Carbohydrate | 11g |
| Sugars | 6g |
| Protein | 1g |
| Fiber | 1g |
- Rich in antioxidants from cocoa powder
- Gluten-free and vegan options significantly reduce allergens
- Potential to lower sugar with alternative sweeteners
Healthier Alternatives for the Recipe
Chocolate doesn’t have to be a guilty pleasure. There are several substitutions to lighten these bites without sacrificing taste:
- Swap butter for unsweetened applesauce or Greek yogurt: Cuts calories and fat, adds moisture.
- Replace sugar with maple syrup or honey: Natural sweetness, plus a slight flavor twist.
- Use almond or oat flour: Increases protein, makes the recipe gluten-free.
- Substitute eggs with mashed banana or flaxseed meal: Vegan-friendly and fiber-rich.
- Add chopped dates or figs: Natural sweetness and added fiber.
Think of these swaps as a springboard for creativity, easily tailored to your dietary goals or ingredient preferences.
Serving Suggestions
Brownie bites offer versatility for any occasion, and the right serving idea can elevate the experience.
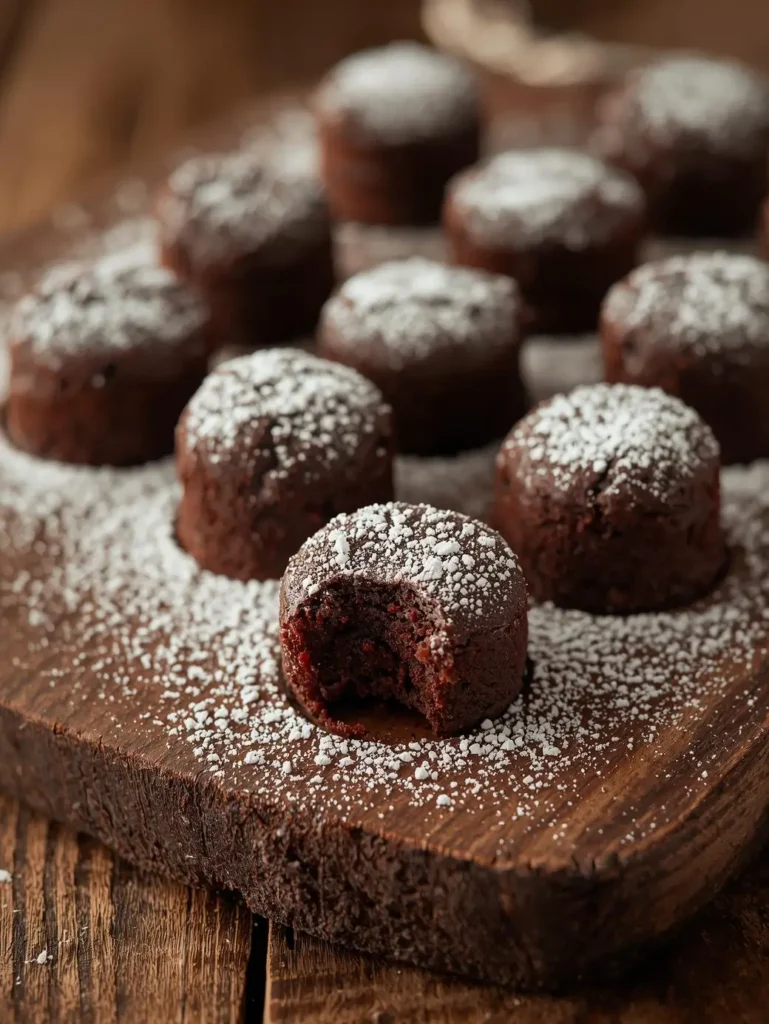
- Classic elegance: Arrange on a vintage cake stand, sprinkled with powdered sugar.
- Ice cream pairing: Serve warm alongside a scoop of vanilla or salted caramel ice cream.
- Dipped magic: Dip half of each bite in melted dark chocolate and sprinkle with sea salt.
- Party platter: Combine with mini cookies, fruit, and candies for a festive dessert board.
- Lunchbox treats: Pack a couple in wax paper for a kid-friendly snack.
Personal tip: Warm them for five seconds in the microwave before serving for that fresh-baked sensation.
Common Mistakes to Avoid
Even seasoned bakers can run into hiccups. Here are frequent issues—and smarter ways to sidestep them:
- Overbaking: The number-one culprit for dry brownie bites. Remember, residual heat will finish the job.
- Skipping the sifting: Leads to lumps and uneven texture.
- Ignoring portion sizes: Overfilled cups might bake unevenly or overflow.
- Not greasing the tin well: Sticking creates messy crumbles.
- Overmixing: Activates gluten, resulting in tougher bites.
By sidestepping these pitfalls, you create reliably delicious, Instagram-worthy results every time.
Storing Tips for the Recipe
Brownie bites rank high for make-ahead potential and storage.
- Room temperature: Keep in an airtight container up to 3 days; a slice of bread inside helps maintain soft texture.
- Refrigeration: Lasts about a week—bring to room temp for best flavor.
- Freezing: Place cooled bites in zip-top bags (remove air) and freeze for up to 3 months. Thaw at room temp or gently microwave.
Batch baking and freezing make these treats particularly practical for busy weeks or unexpected guests.
Summary
Brownie bites bring together rich chocolate, perfect portion control, and creative adaptability in one simple treat. With an efficient prep time and easy storage, they fit effortlessly into any baker’s repertoire. Don’t wait—try this recipe, share your results in the review section below, and subscribe for more delightful baking ideas.
FAQs
Can these brownie bites be made gluten-free? Absolutely! Just substitute a high-quality gluten-free all-purpose flour blend in place of regular flour.
How do I keep my brownie bites fudgy instead of cakey? Stick to the lower baking time and avoid overmixing. Using melted chocolate in place of some cocoa powder also gives a richer, denser texture.
Can I double the recipe for a larger batch? Yes—simply multiply each ingredient by two and bake in two mini muffin trays, adjusting bake time only if your oven’s airflow requires it.
What’s the best way to add extra flavors? Fold in espresso powder, orange zest, or a pinch of cinnamon to create subtle undertones that complement the chocolate.
Are brownie bites suitable for kids’ parties? Definitely! They’re mess-free, easy to handle, and a hit with all ages. Consider colorful liners or sprinkles for extra fun.
Is it okay to use oil instead of butter? You can swap in neutral oils like canola or coconut oil for a slightly different crumb and moisture profile.
How do I know when my brownie bites are done? Look for set tops and a toothpick that yields a few moist crumbs—avoid waiting for a fully clean tester, as that means they’re overbaked.
Hungry for more snackable ideas? Browse our archives for countless easy dessert recipes and never run out of sweet inspiration!