


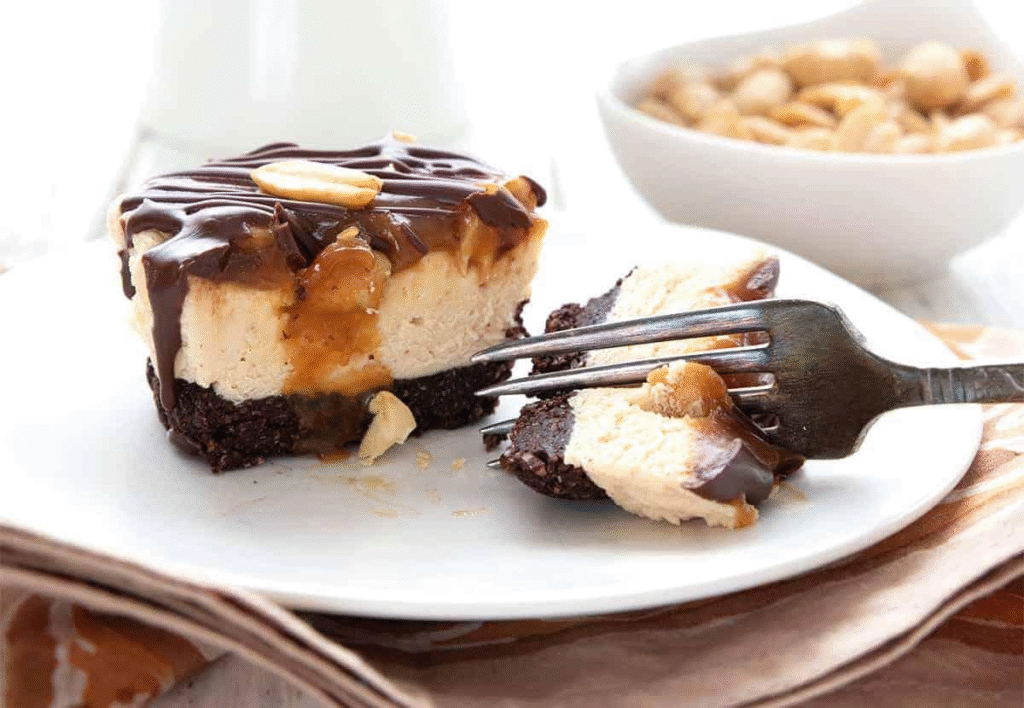
This keto peanut butter dessert is a rich, no-bake bar with creamy filling and chocolate topping—easy, low-carb, and fridge-friendly.
So you want dessert, but you also want to keep it keto and avoid spending your whole evening washing mixing bowls. Excellent choice. These no-bake peanut butter bars are creamy, rich, a little salty, a little sweet, and dangerously easy to keep “just sampling” until half the pan mysteriously disappears.
This is the kind of recipe that feels like you got away with something. You stir, spread, chill, slice, and suddenly you’ve got a legit treat that tastes way fancier than the effort involved.
Why This Keto Peanut Butter Dessert Recipe Is Awesome
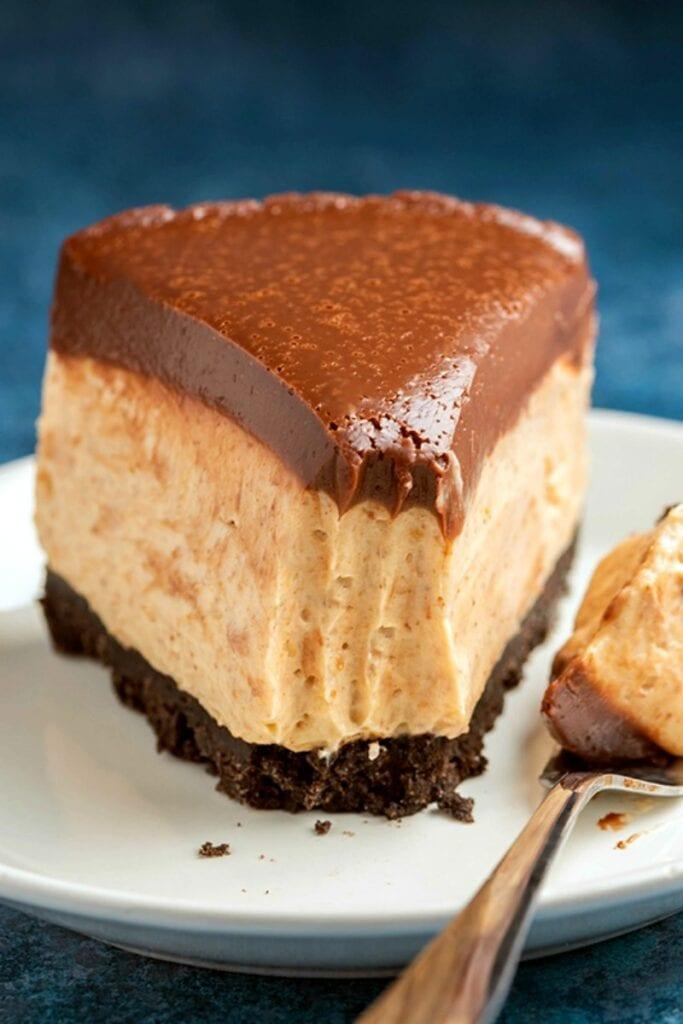
This recipe wins because it keeps things simple without tasting boring. You get that deep peanut butter flavor, a smooth cheesecake-like texture, and a chocolate topping that makes the whole thing feel like dessert instead of “a snack pretending to be fun.”
It’s also no-bake, which means no oven drama, no guessing if the center is done, and no standing around staring through the oven door like that will somehow help. If you can use a hand mixer and a spoon, you can make this. Honestly, even if you’re a little chaotic in the kitchen, you’ve still got a strong shot.
A few more reasons this one earns repeat status:
- Rich and satisfying
- Low-carb payoff: Big dessert energy without the sugar crash
- Great for make-ahead nights
- Beginner-friendly method: No candy thermometer, no weird tricks, no stress
- Fridge-friendly leftovers
And yes, they taste cold straight from the pan, which is useful information and not at all a confession.
Ingredients You’ll Need for This Keto Peanut Butter Dessert
You only need a handful of basics here, and most of them are easy to find. Keep it simple, and let the peanut butter do the heavy lifting.
- Cream cheese
- Unsweetened peanut butter: Creamy works best, and check the label for added sugar
- Butter
- Powdered keto sweetener: Powdered blends smoothly, unlike gritty granulated sweetener
- Vanilla extract
- Almond flour
- Pinch of salt: Tiny amount, huge flavor difference
- Sugar-free chocolate chips
- Coconut oil: Helps the chocolate topping melt and spread like a civilized adult
A quick note on peanut butter: natural peanut butter can work, but it needs to be well stirred and not too runny. If there’s a whole oil lake sitting on top, give it a serious mix before measuring.
Step-by-Step Instructions for the Keto Peanut Butter Dessert
This comes together fast, so it helps to line your pan and measure everything first. Use an 8×8-inch pan or a loaf pan if that’s what you’ve got. No need to make it complicated.
Line the pan.
Use parchment paper and leave a little overhang on the sides so you can lift the bars out later. Future you will be very grateful when it’s time to slice.Beat the cream cheese and butter.
Put softened cream cheese and softened butter in a mixing bowl. Beat until smooth and fluffy, with no sad little lumps hiding in the corners.Add the peanut butter, sweetener, vanilla, and salt.
Mix until the filling looks creamy and uniform. Taste it if you want. Actually, taste it once, not six times, or your “bars” will become “a thin layer of good intentions.”Stir in the almond flour.
This gives the bars more structure and helps them set into neat slices. The mixture should be thick but still easy to spread.Press the filling into the pan.
Spread it evenly with a spatula or the back of a spoon. Smooth the top as best you can, or call it rustic and move on.Make the chocolate topping.
Melt the sugar-free chocolate chips with the coconut oil in short bursts in the microwave, stirring between each round. Once smooth, pour it over the peanut butter layer and spread it edge to edge.Chill and slice.
Refrigerate for at least 2 hours, or until firm. Lift the bars out using the parchment, slice into squares, and try to act casual when people ask where you bought them.
Quick tip: For cleaner slices, chill the bars well and run your knife under hot water before cutting. Wipe the blade between cuts if you want those sharp little bakery-style edges.
Common Mistakes to Avoid With Keto Peanut Butter Dessert
This recipe is easy, but a few tiny mistakes can make it messier than it needs to be. Nothing tragic, just mildly annoying.
- Using peanut butter with added sugar: It messes with both the carb count and the flavor balance
- Skipping the parchment paper
- Trying to cut the bars too early: Warm bars don’t slice, they squish
- Overmixing the melted chocolate after it starts to cool
- Using cold cream cheese: Lumps are not charming here
The biggest rookie move? Not softening the cream cheese first. You can beat it for ages, but if it starts cold and stubborn, it’ll stay a little clumpy and weird. Still edible, sure. Pretty? Not so much.
Another one: using a sweetener you already know you don’t like. Some keto sweeteners have a cooling effect or a stronger aftertaste. If you’ve had one before and thought, “Hmm, tastes like fake sadness,” maybe don’t use it in dessert.
Alternatives and Substitutions for Keto Peanut Butter Dessert
This recipe has room to flex a little, which is great if your pantry looks like a random collection of half-used baking supplies. A few swaps work beautifully, and a few are acceptable if you’re in a pinch and feeling bold.
| Ingredient | Easy swap | What to expect |
|---|---|---|
| Peanut butter | Almond butter | Slightly milder flavor, still rich and creamy |
| Cream cheese | Mascarpone | Softer texture, a little more luxurious |
| Almond flour | Coconut flour | Use much less, since coconut flour soaks up moisture fast |
| Powdered keto sweetener | Monk fruit blend | Good sweetness, depends on the brand |
| Sugar-free chocolate chips | Melted dark chocolate keto bar | Smoother topping, often better flavor |
| Coconut oil | Butter | Works fine, though the chocolate may set a bit softer |
If you want a stronger peanut butter punch, add a tablespoon more peanut butter and a tiny extra pinch of salt. If you want it lighter, fold in a little whipped heavy cream before pressing the mixture into the pan. That gives you more of a mousse-bar vibe, which is honestly pretty excellent.
And if you’re tempted to swap peanut butter for sunbutter, go ahead if you need a peanut-free option. Just know the flavor changes a lot. Still good, just different. IMO, almond butter is the smoothest backup if you want something closest in texture.
FAQ About Keto Peanut Butter Dessert
Can I use natural peanut butter in this keto dessert?
Yes, but stir it really well first. If it’s too oily or too thin, the filling can turn softer than planned. A no-stir peanut butter usually gives the neatest bars.
Do I need a mixer for the filling?
Not absolutely, but it helps a lot. You can mix by hand if your cream cheese and butter are very soft and you’ve got solid arm energy. A hand mixer just gets you smoother results faster.
How long do these bars last in the fridge?
About 5 days, stored in an airtight container. They actually taste even better after a few hours of chilling, so making them ahead is a smart move. FYI, they’re also much easier to slice when fully cold.
Can I freeze this peanut butter keto dessert?
Yep. Freeze the sliced bars in a single layer first, then transfer them to a container or bag. Let them sit at room temp for a few minutes before eating unless you enjoy attacking frozen dessert with your teeth, which feels ambitious.
Is this recipe very sweet?
Not wildly sweet, and that’s part of why it works so well. The peanut butter, cream cheese, and chocolate keep it balanced. If you like sweeter desserts, add a little more powdered sweetener to the filling and taste as you go.
Can I make this dairy-free?
You can try dairy-free cream cheese and vegan butter, though the texture may be softer. Keep the bars chilled well before slicing. It’s doable, just not quite as rich as the original.
What’s the best way to serve these?
Cold, straight from the fridge, is the best move. You can also top them with a pinch of flaky salt or a drizzle of melted peanut butter if you’re feeling extra. And honestly, “standing in front of the fridge with a fork” counts as serving.
If your sweet tooth has been making rude little comments all week, this recipe should quiet it down nicely. Make a pan, hide a couple pieces for later, and enjoy the rare pleasure of a dessert that tastes indulgent without turning your kitchen into chaos.